
1. Login Page
- The College Connect application login screen serves as the gateway for students to access their accounts and engage with the platform's features.
- Fields
- Username: Enter Login Username.
- Password: Enter Login password.
- Remember Me: Enable the option to store data for future Login.
- Procedure:
- To log into the system, enter your login ID in Username and login password in the Password field.
- Click Sign In.
- Notes:
- You will be prompted with error message: "Login Fail. Username or Password incorrect" when:
- Username is blank.
- Password is blank.
- Incorrect user ID or password entered.
- Click on Forgot Password if Required.
- Click on Register if not yet registered.
- Remember me autofills the credentials on subsequent login.
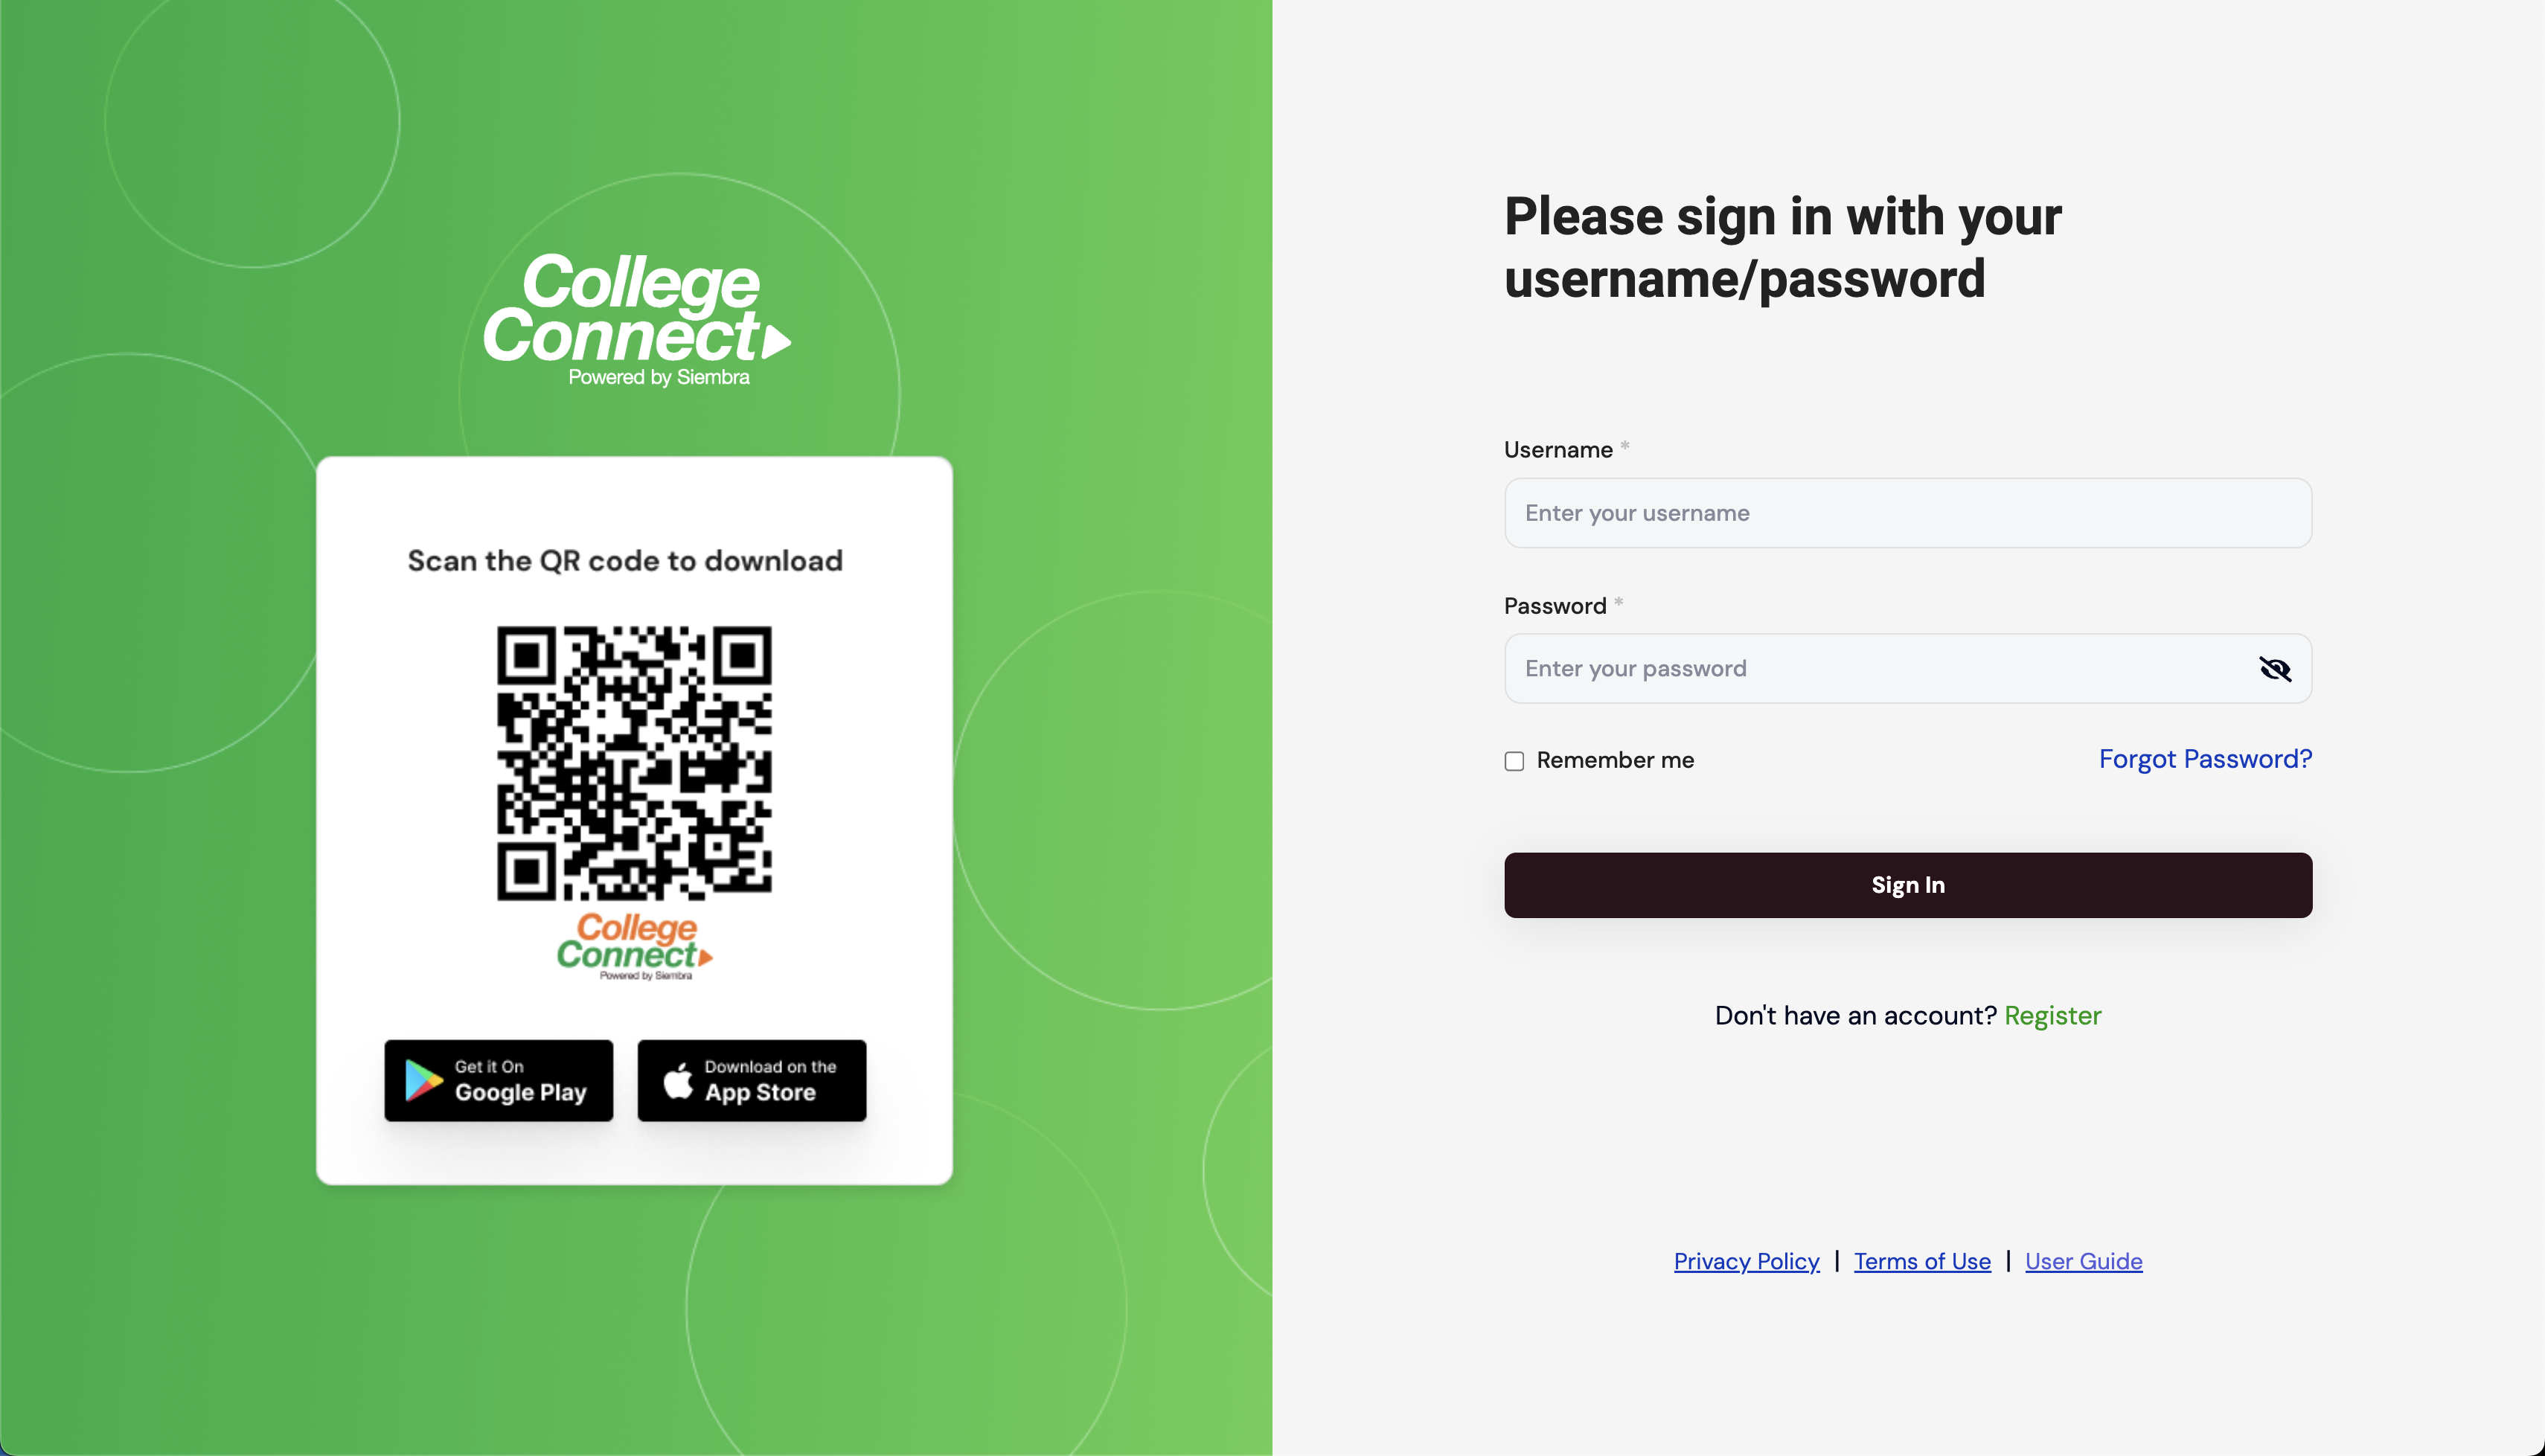
Screen 1.0.1: Login Screen.
Back To Login
2. Student Registration
- To register as a Student, click on Register on the Login page and click on Student Connect.
- There are 2 ways for Registration:
- With Student ID.
- Without Student ID.
Screen 2.0.1: On the login page click on Register to start registration process.
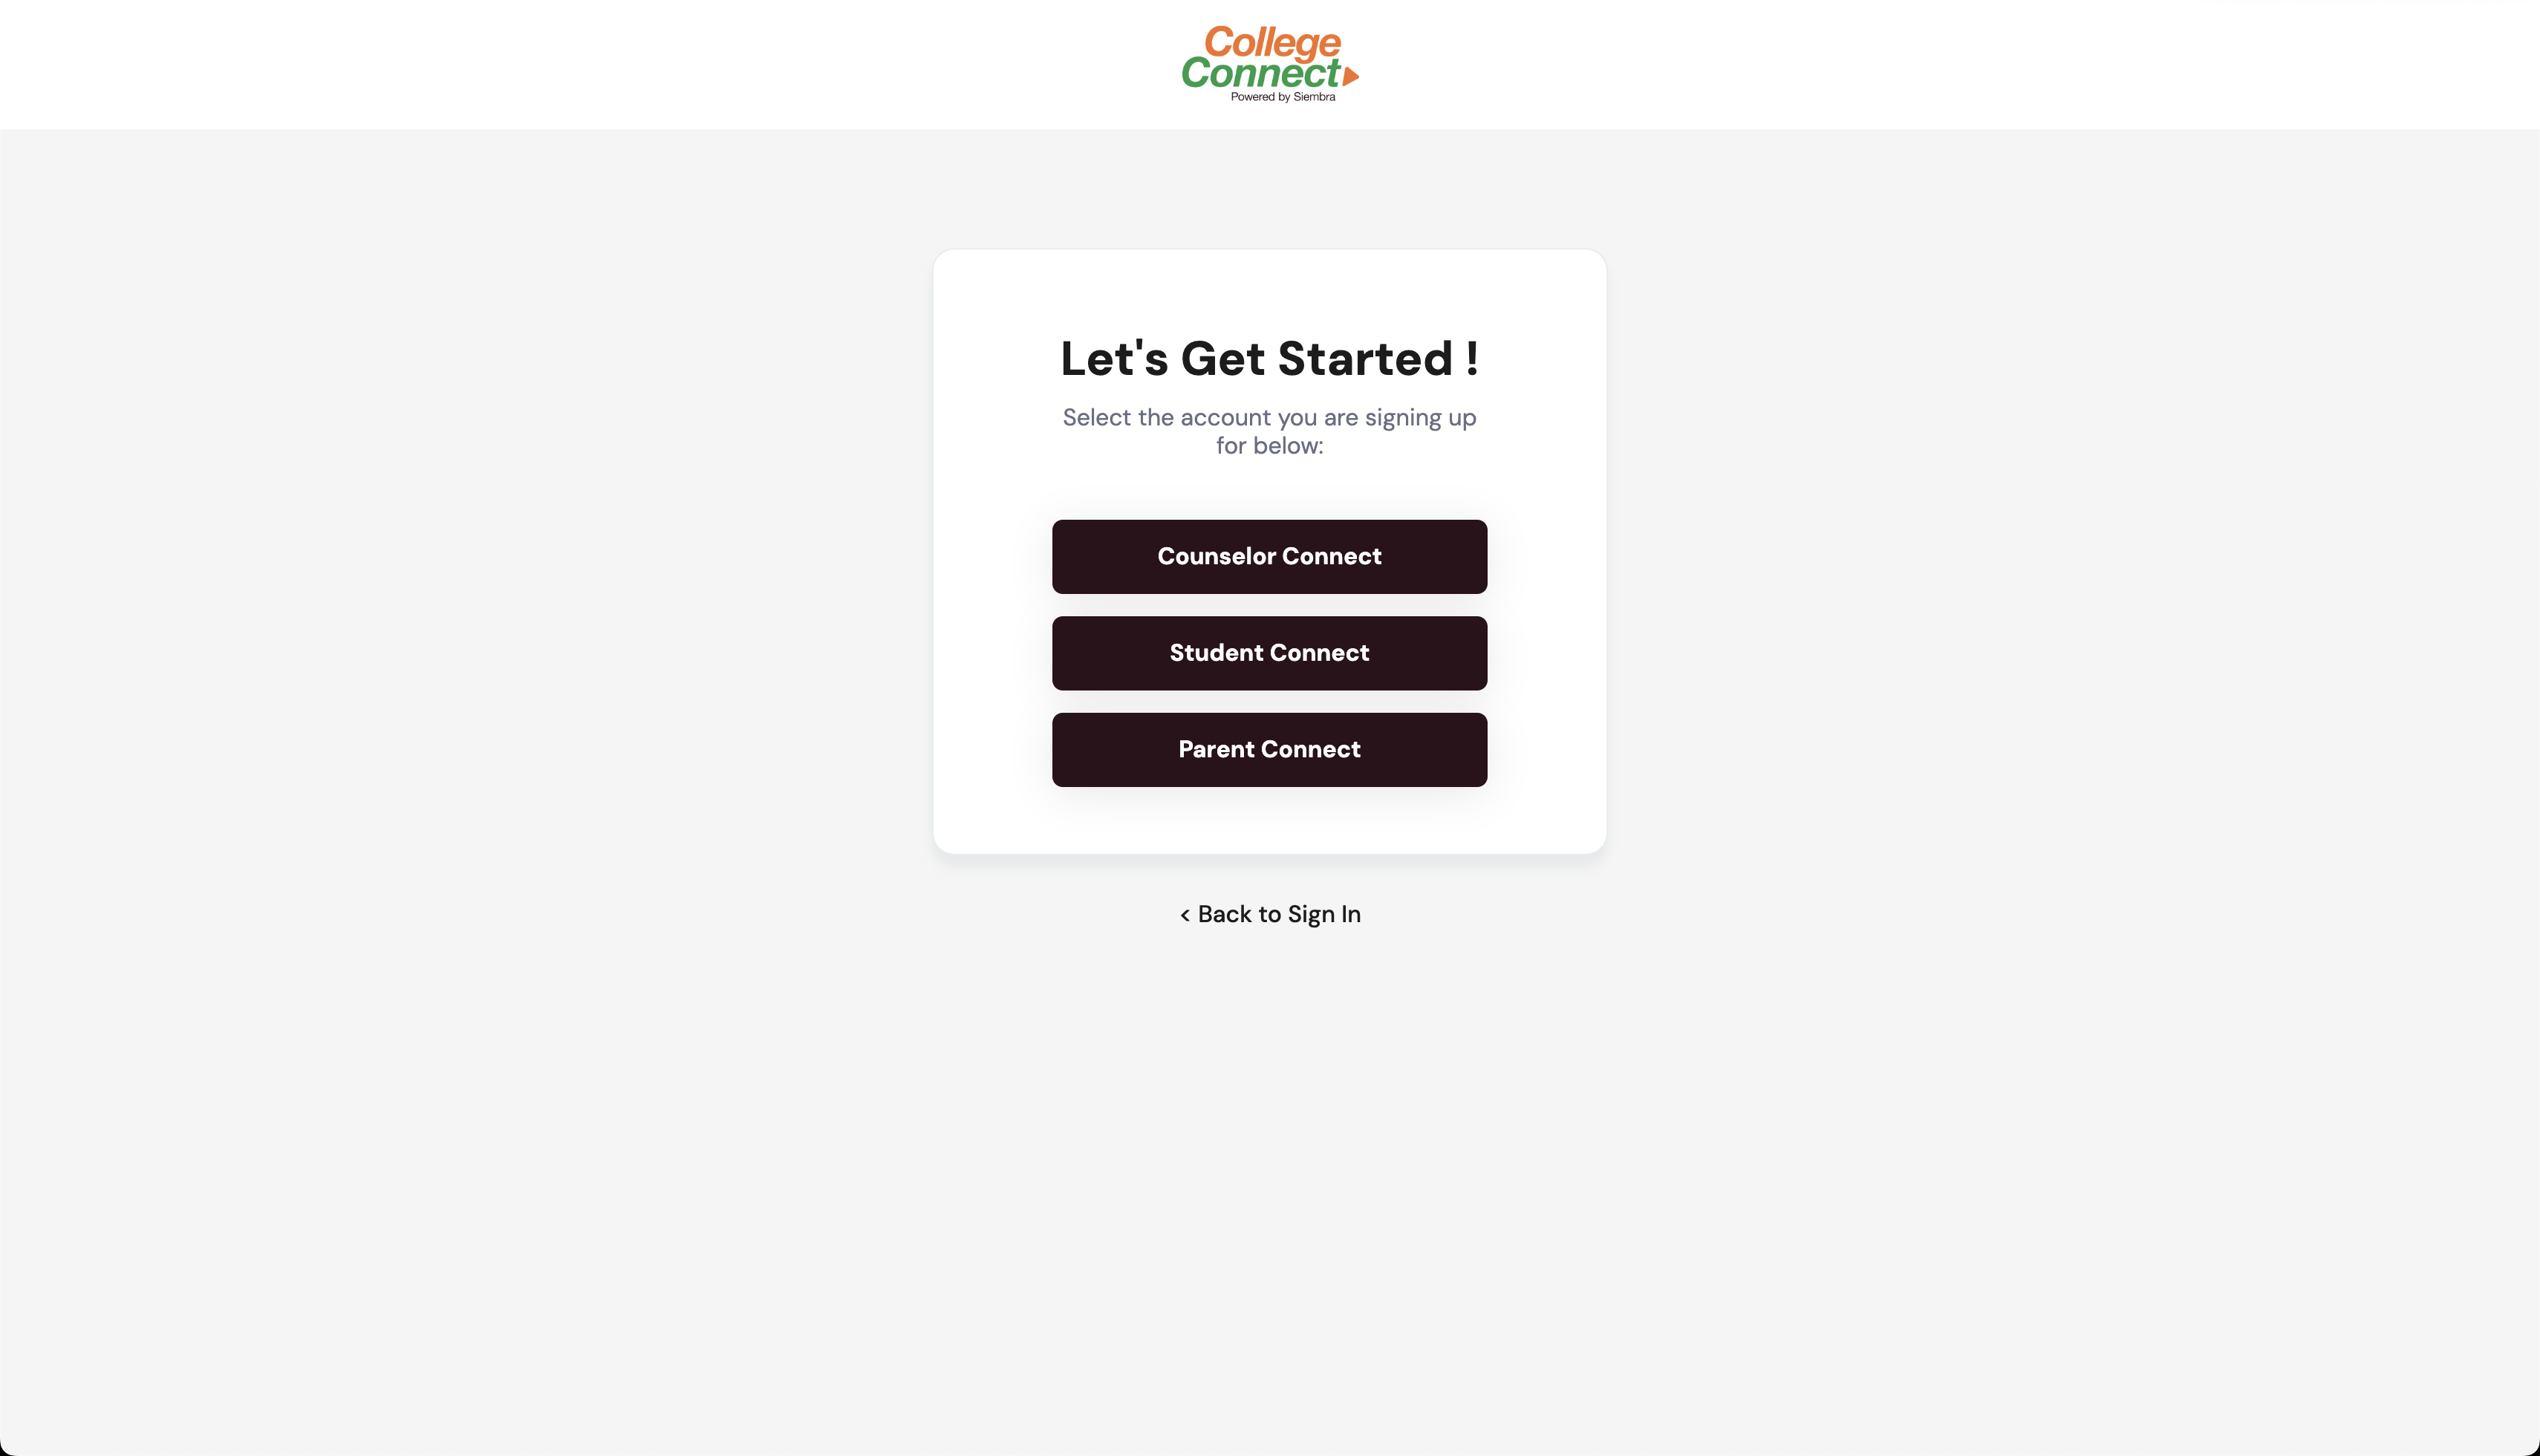
Screen 2.0.2: On the Registration Screen click on Student Connect to register as a student.
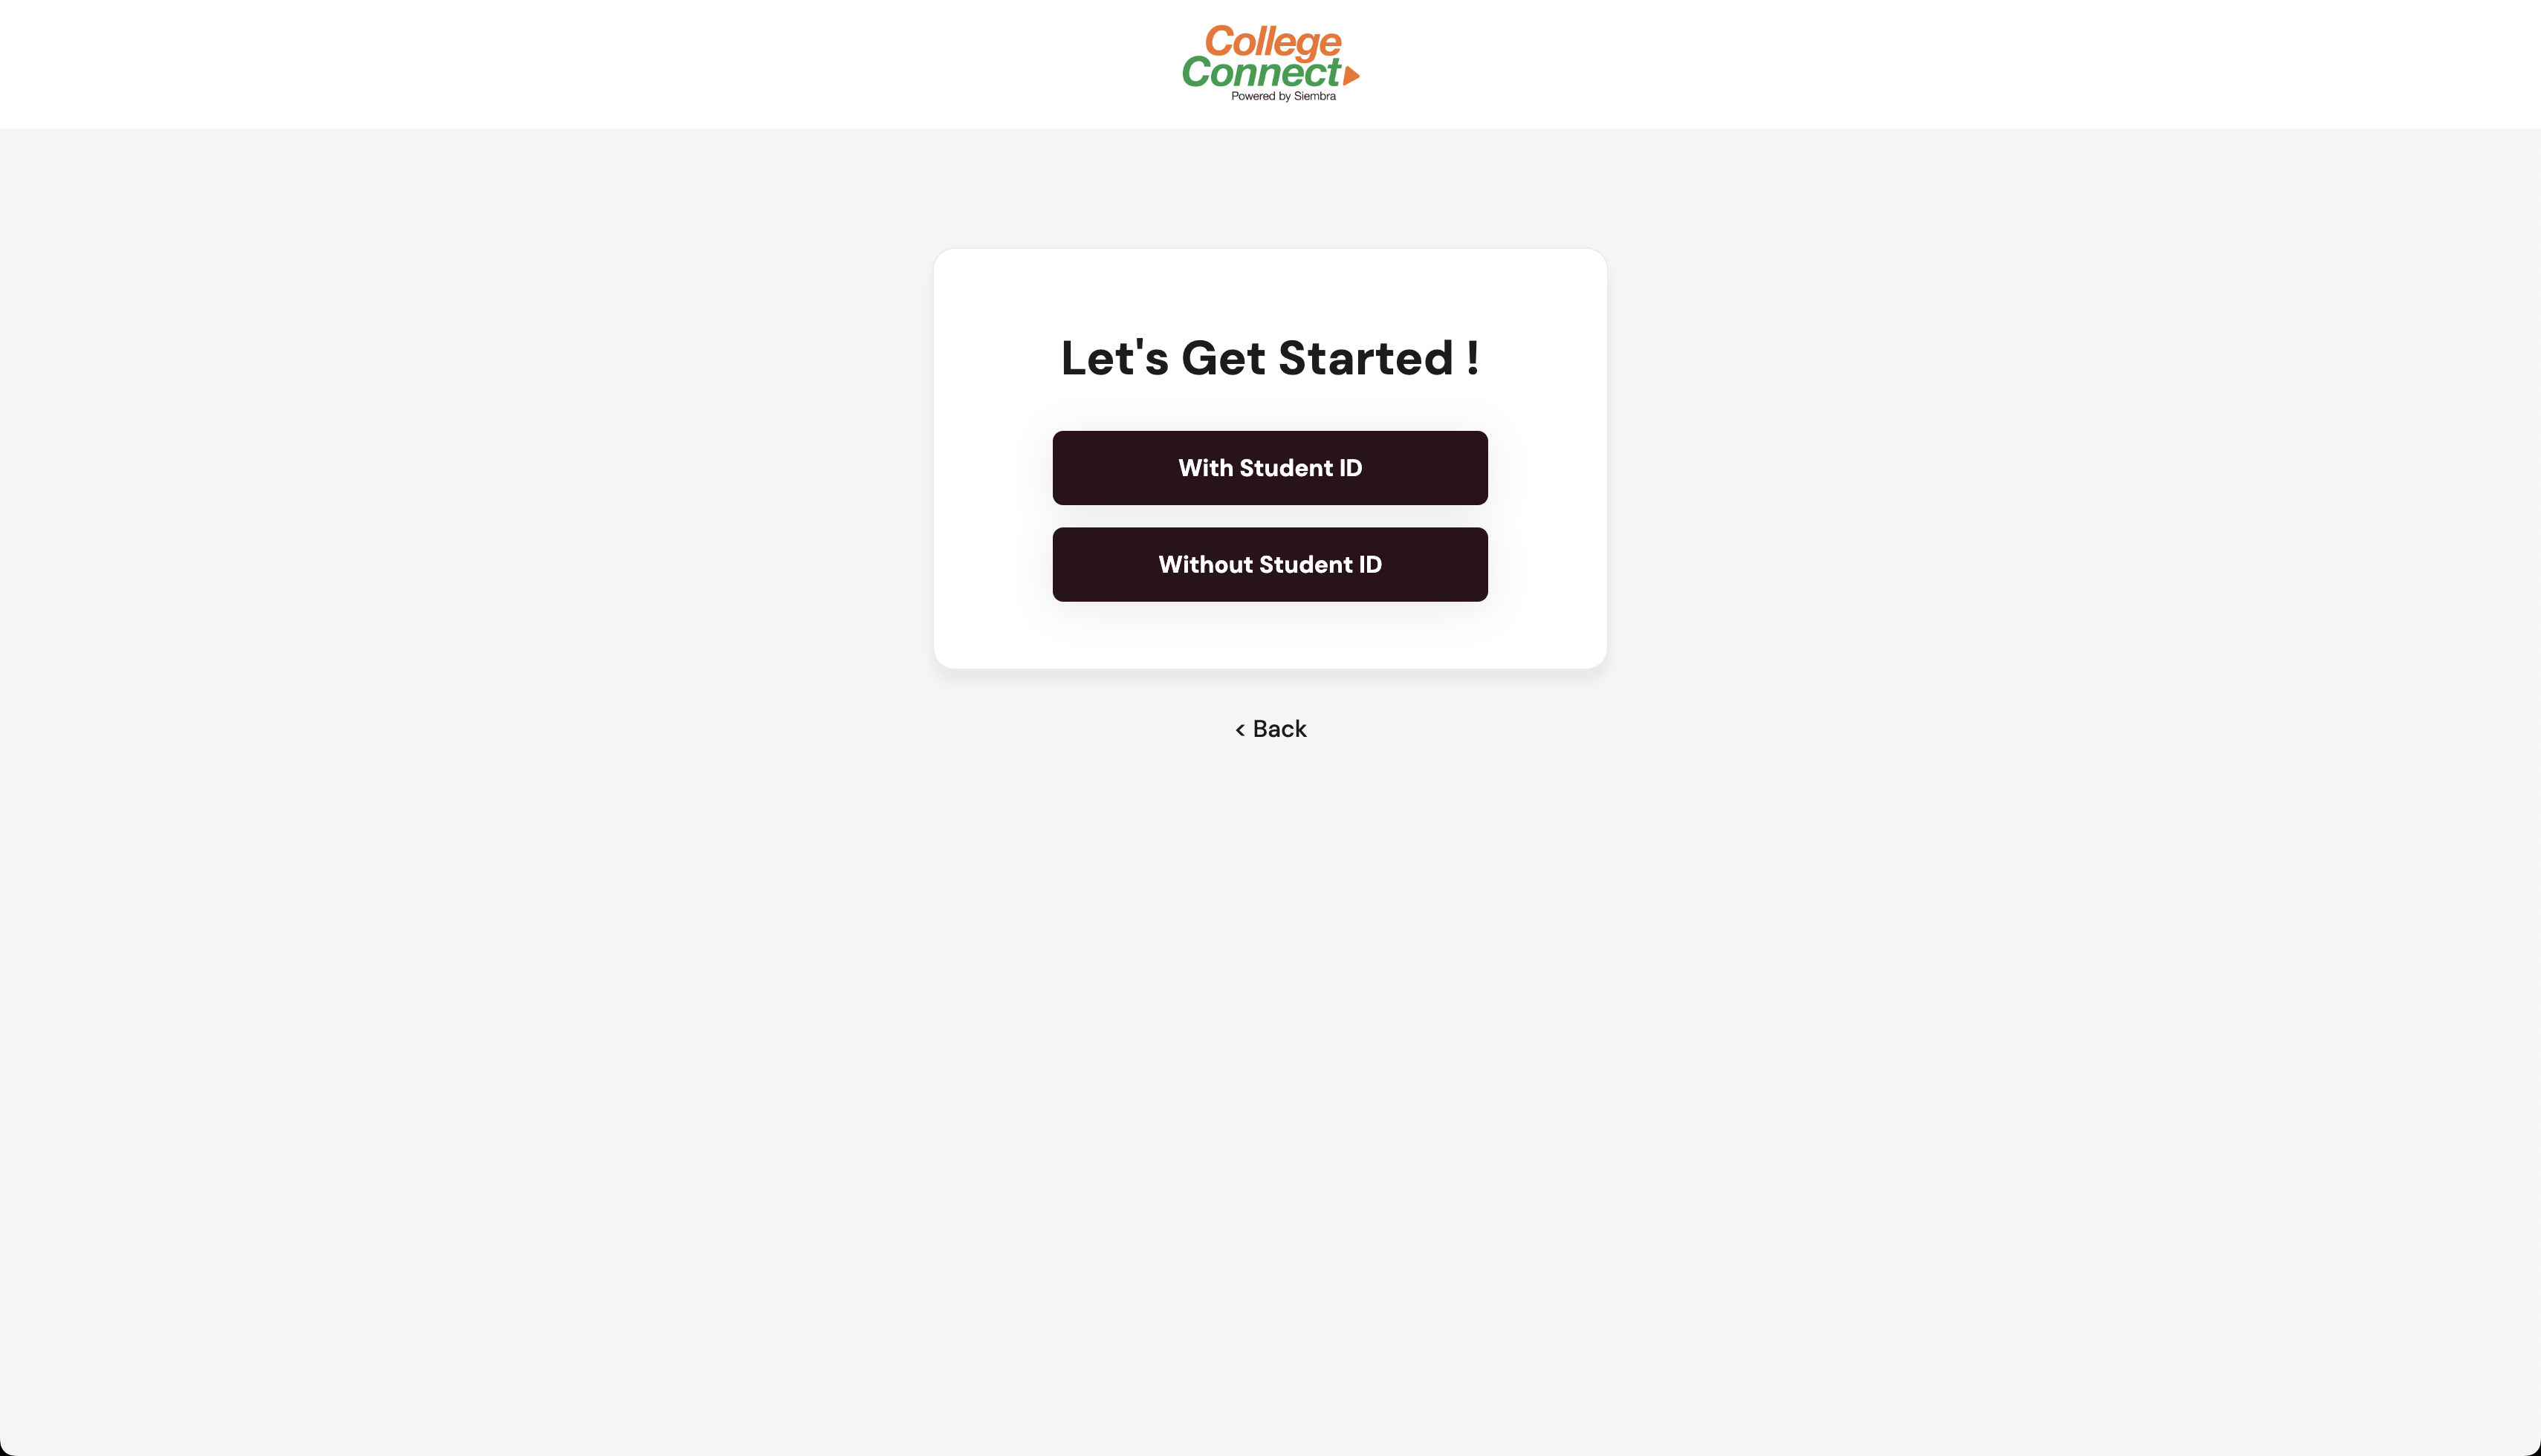
Screen 2.0.3: There are 2 ways to register as a student, with and without student ID.
- Procedure:
- Select the Student connect option for student registration.
- Notes:
- You can go back to the user inquiry page at any time by clicking the “Cancel” button or “<” icon.
2.1 Registration with Student ID.
- With Student ID is a flow specifically for students who have Done SFTP registration.
- Should know the Student ID and School Name Fields.

Screen 2.1.1: Fill up the required details and click on Next.
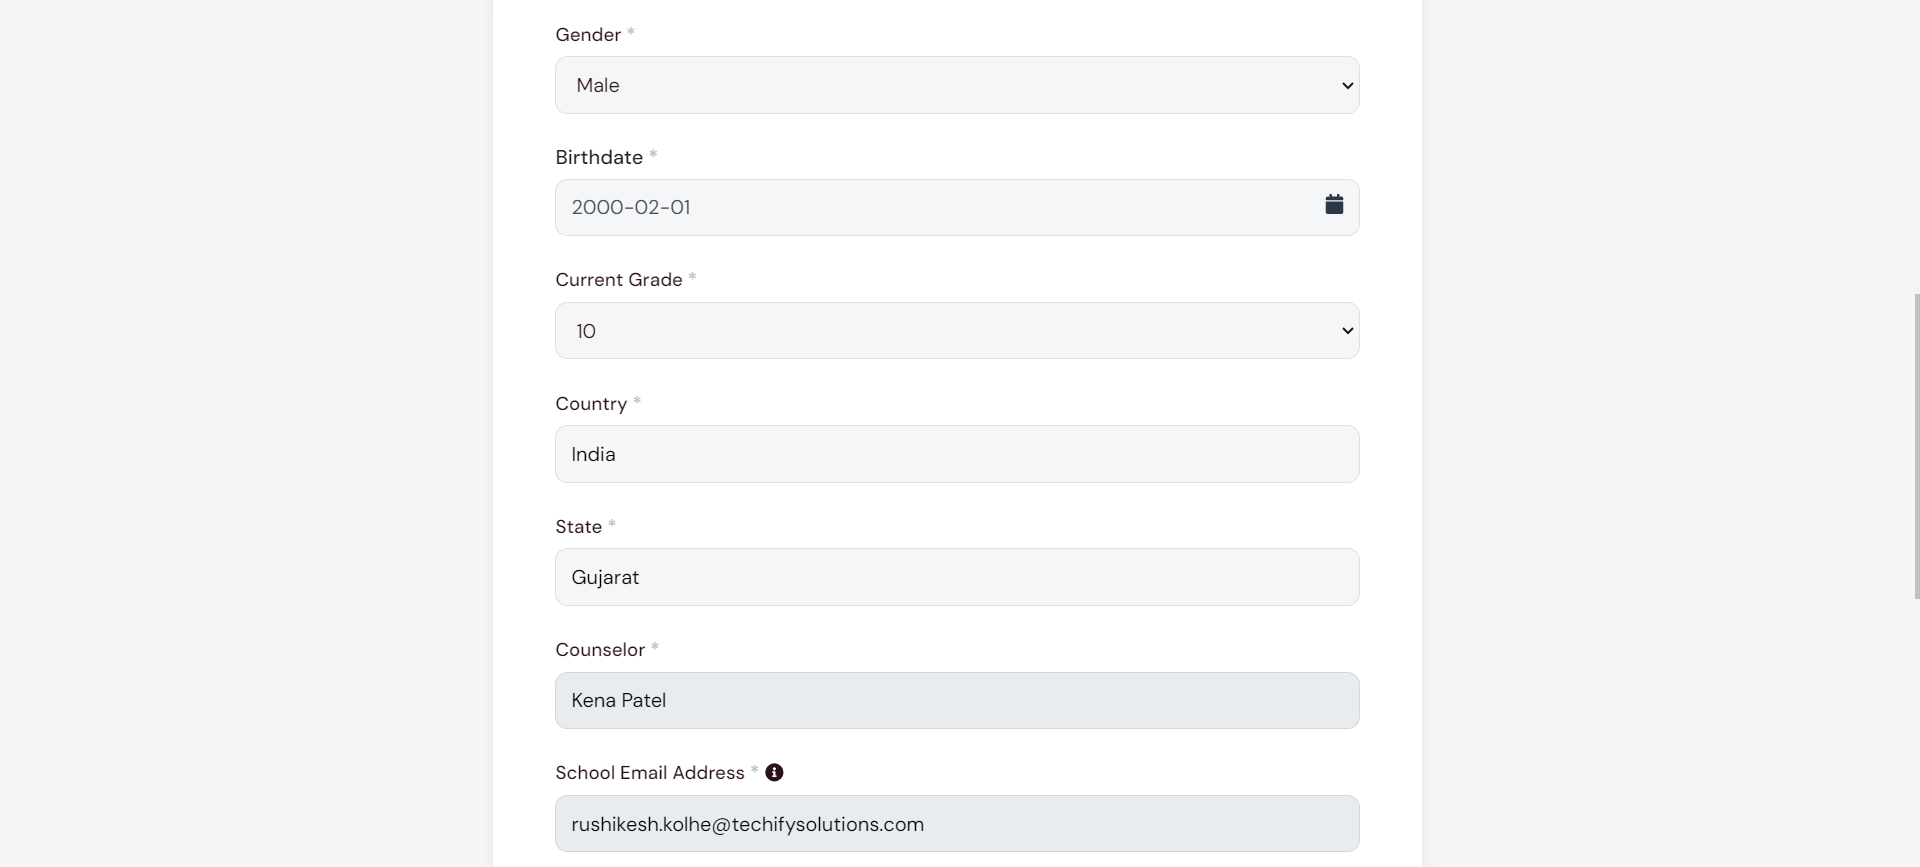
Screen 2.1.2: Fill the required details correctly.
Screen 2.1.3: Fill the required details correctly.
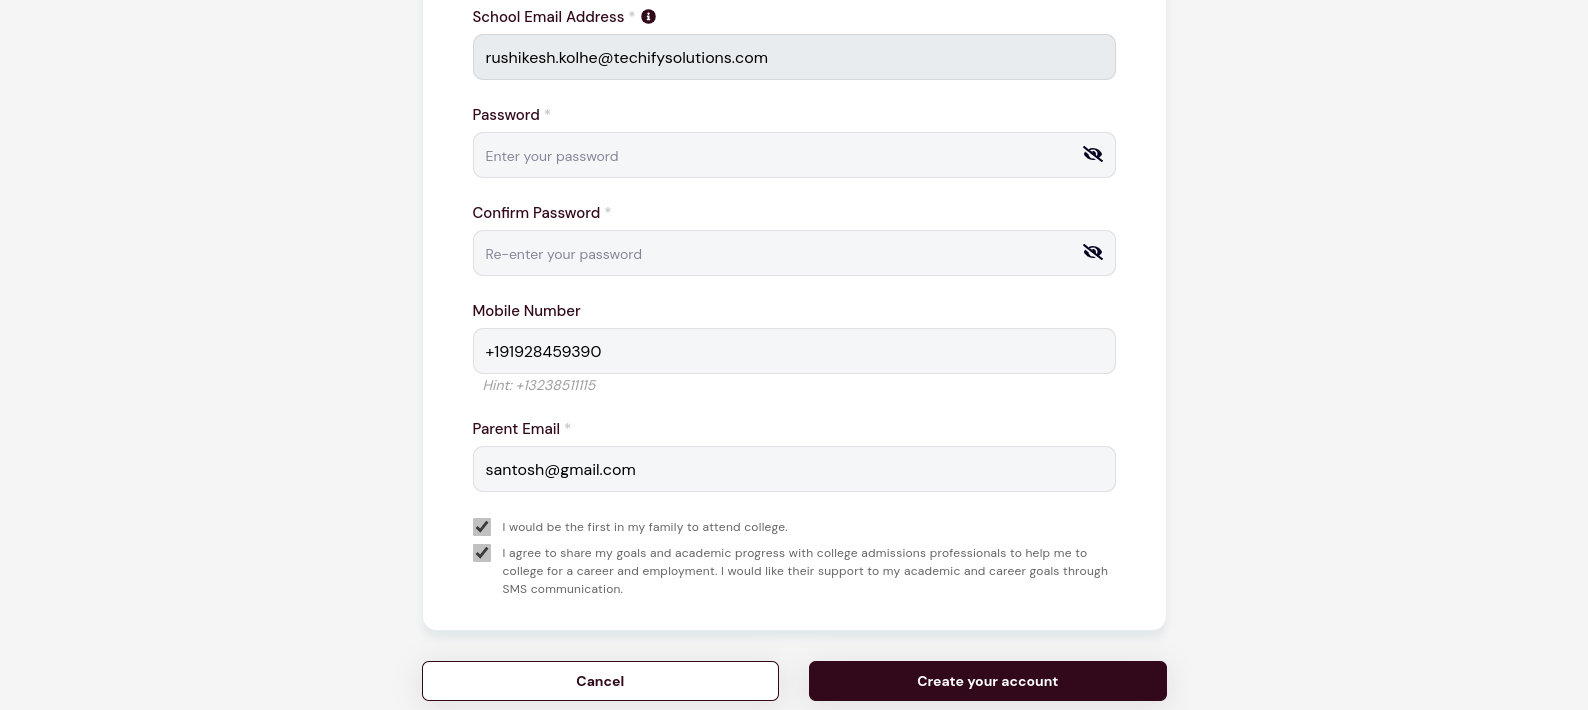
Screen 2.1.4: Fill the required details correctly and click on create account.
Screen 2.1.5: You will be redirected to the Sign In Page. Enter the credentials and Sign In.
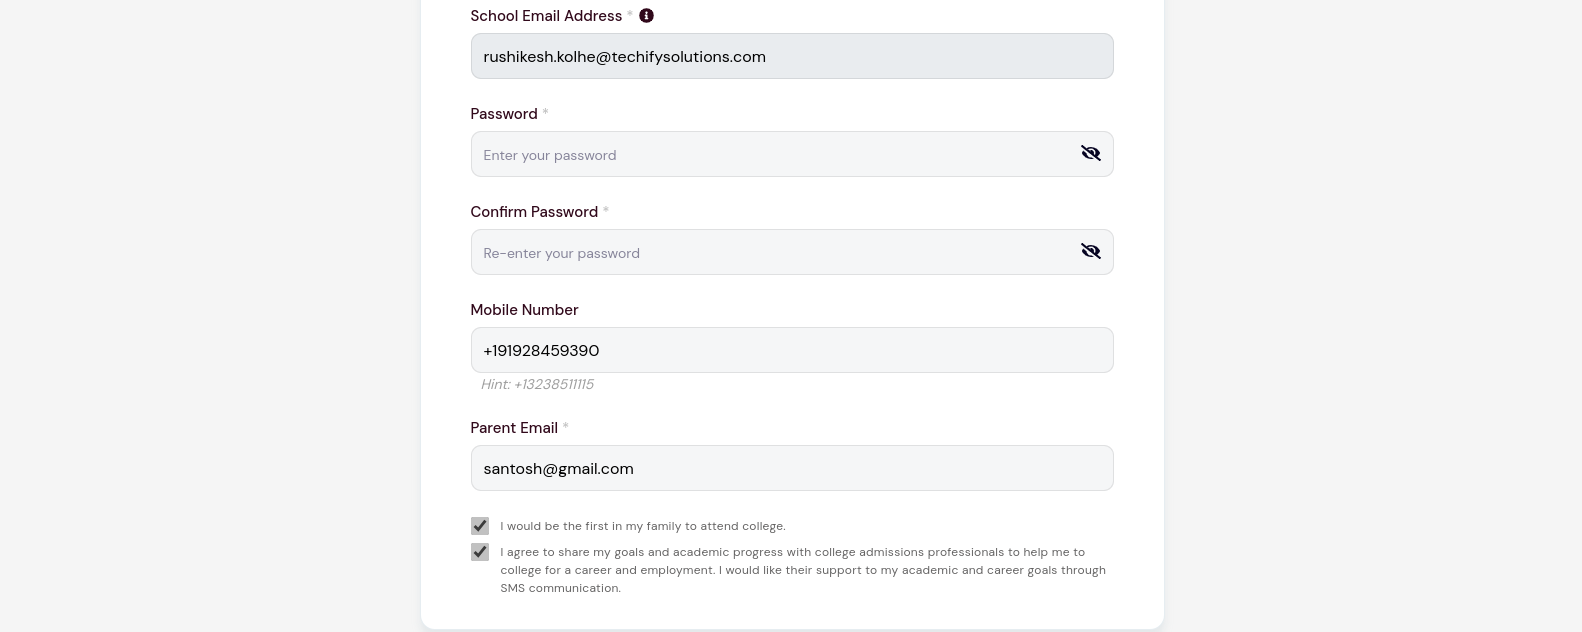
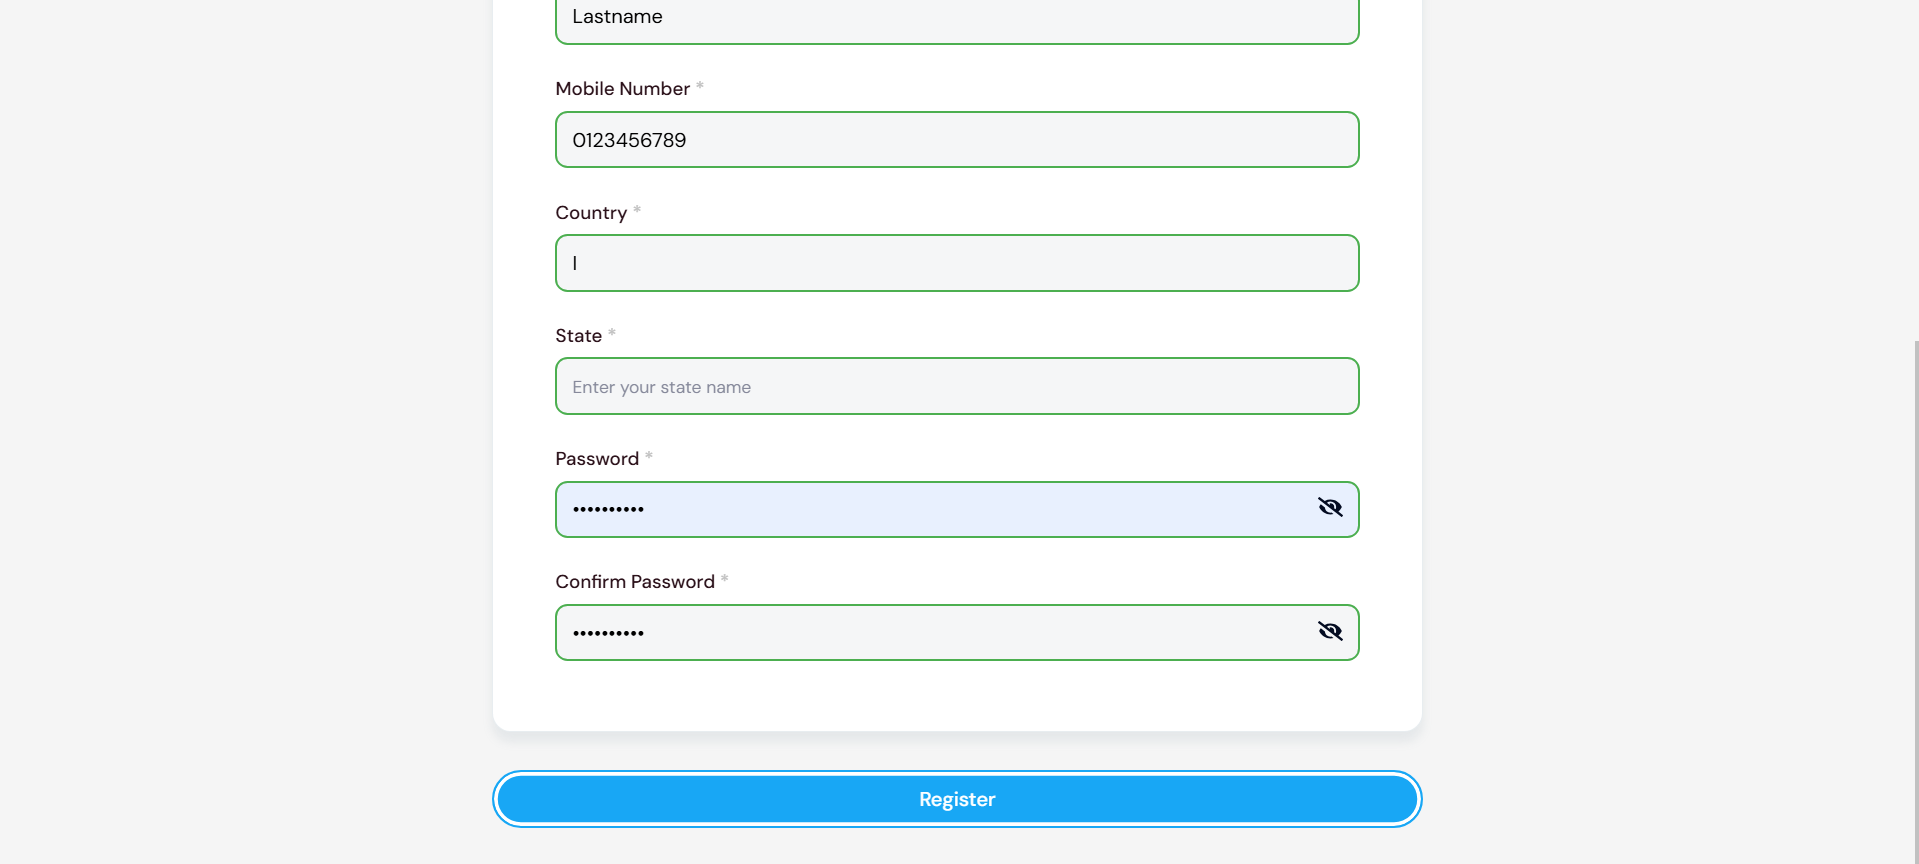
- School Name: Students enter “School Name” Then open the list of school names and select the school.
- First Name: Students enter First Name.
- Last Name: Students enter Last Name.
- Student ID: Students enter Student ID.
- Gender: Select the gender.
- Birthday: Select the birthday.
- Current Grade: Students select their preferred grade from the Grade listing, instead of it being displayed by default.
- Country: Enter country name and which enables the state input field.
- State: Enabled after Country is entered. If the country is United States, a dropdown list of states is shown. If a country other than United States, then enter the state manually.
- Password: Enter the password.
- Confirm Password: Retype the password to confirm it.
- Mobile Number: Add your Mobile Number.
- Parent Email Address: Add your parents Email Address.
- Terms & Conditions checkboxes: Check the required checkboxes.
- Click on the Register link at the bottom of the Sign In Page if not yet registered.
- You will be redirected to another screen with 2 options: Student Connect and Parent Connect.
- select the Student Connect option and you will be redirected to another screen with 2 Options: With Student ID and Without Student ID.
- Select the With Student ID option.
- You will be redirected to another screen with various input fields.
- Fill all the required details correctly and click Next.
- Fill the remaining required data.
- Make Sure to check the last 2 checkboxes.
- Click on Create Account
- A pop-up message: "Success! Your Account has been created. Please Check your email to verify your account" will be displayed. Click on OK.
- You will be redirected to the Sign In Page again. Enter your credentials and Sign In.
- Make sure to fill in all the details correctly.
- Your password must be at least 8 characters long and can include a combination of letters (both uppercase and lowercase), numbers, and special characters (such as !, @, #, $, etc.).
- Make sure the last 2 checkboxes have been checked in the registration form.
- Make sure to verify your account from the link provided in your Email.
- In the Country field, if your country is The Unites States, then a dropdown list of States will open. If the country is Other than The United States, then you need to manually enter the state.
- You can go back to the user inquiry page at any time by clicking the “Cancel” button or “<” icon.
2.2 Registration Without Student ID.
- Without Student ID registration is for students who have not done SFTP registration.
- There are 2 ways for registration without a student ID:
- With Personal Email ID.
- With Google Email ID.
- To Register with Your personal email ID:
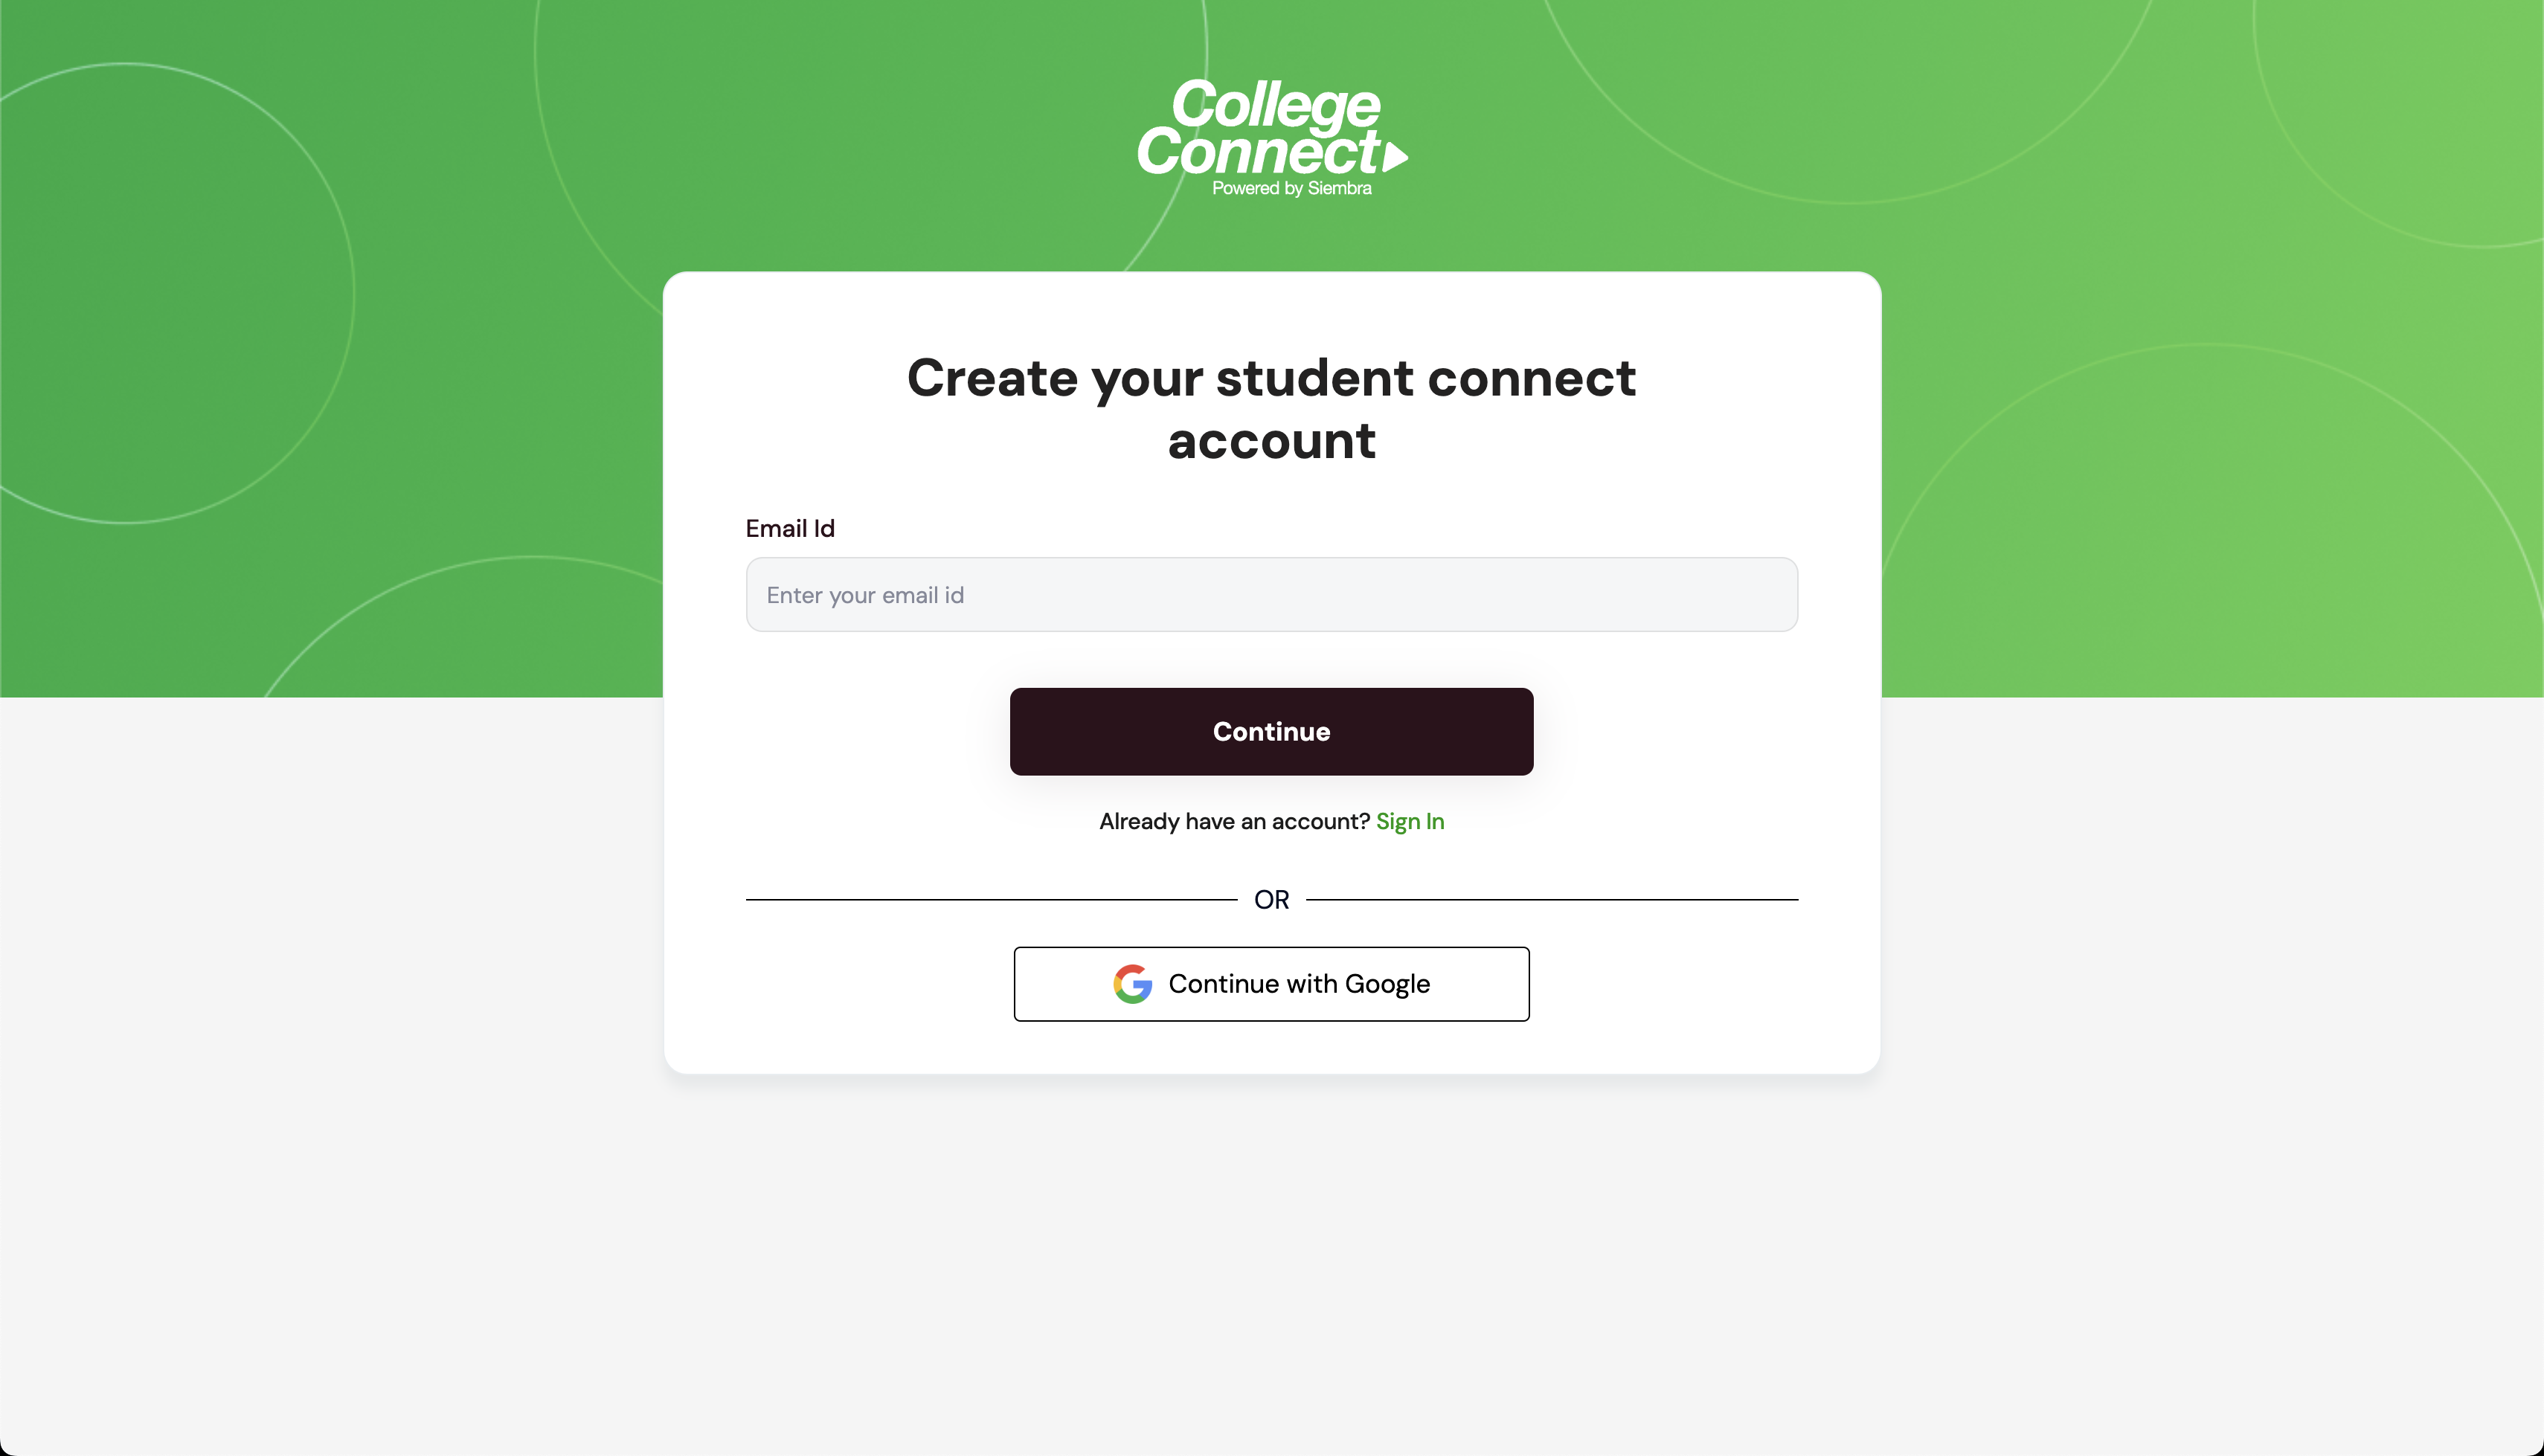
Screen 2.2.1.1: Enter your Personal Email ID.
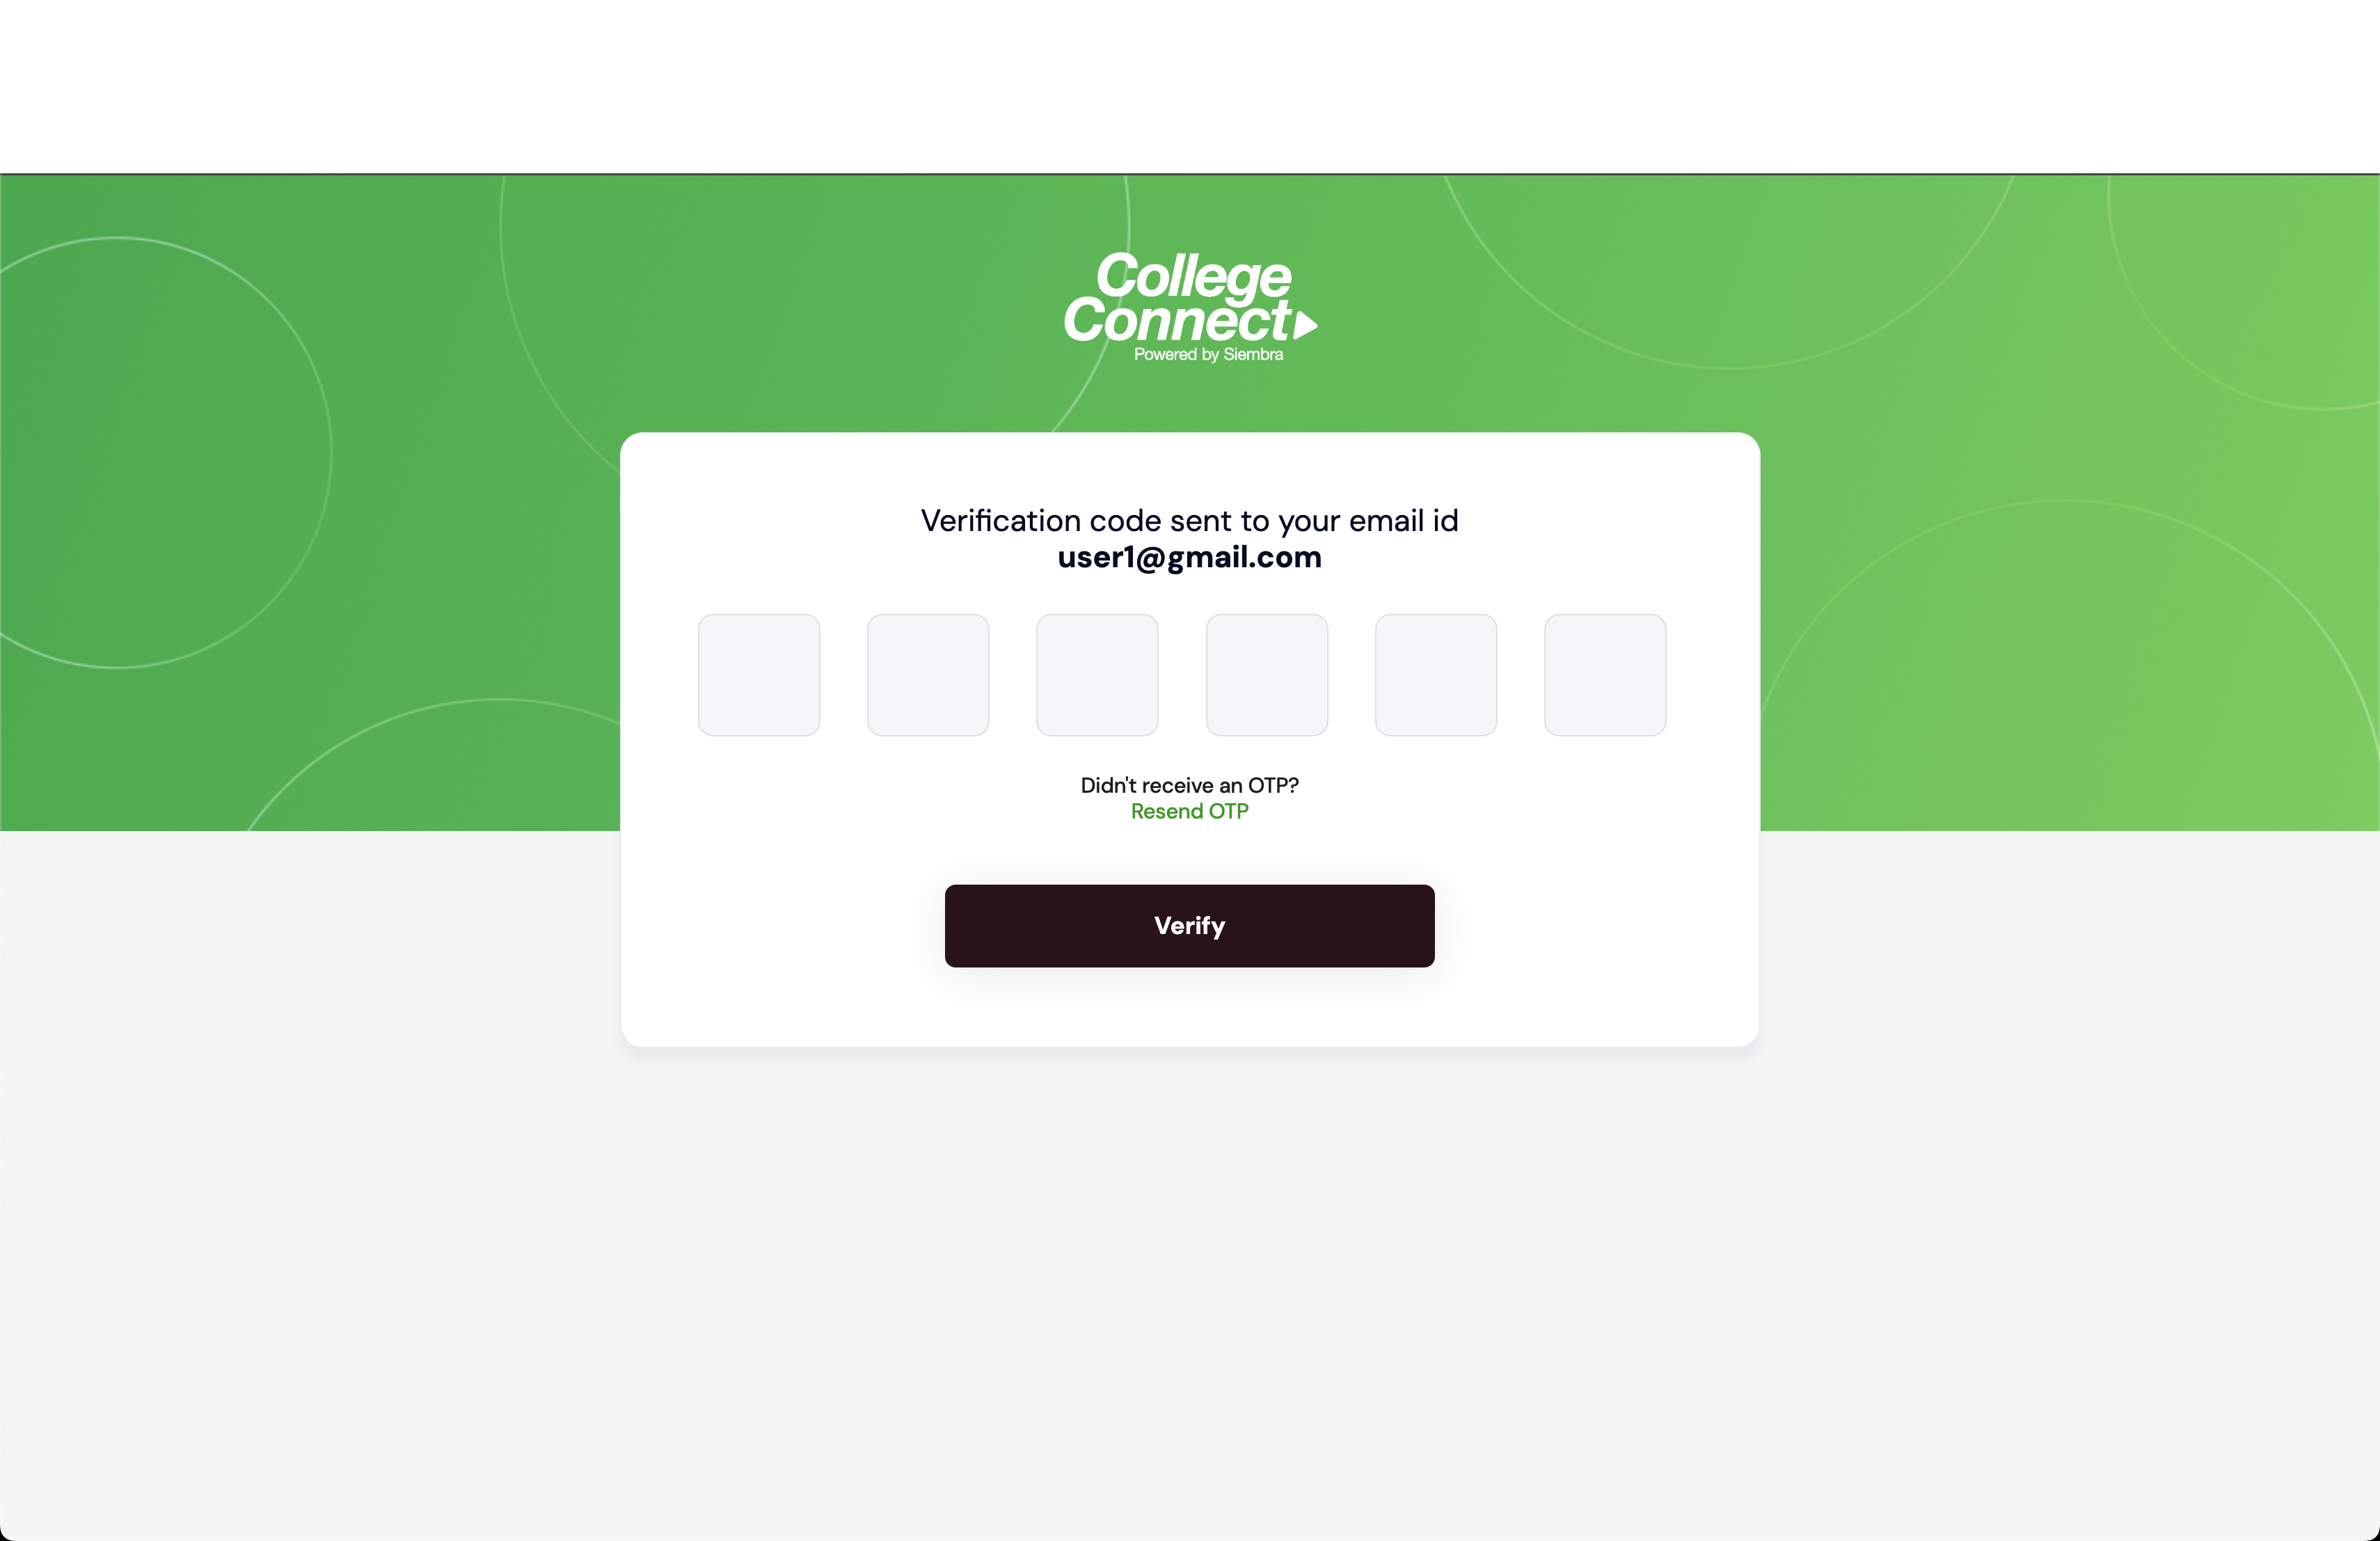
Screen 2.2.1.2: Enter the OTP received in email.

Screen 2.2.1.3: Fill the required details and click on register.
Screen 2.2.1.4: Fill the required details and click on register.
- Email ID: Enter your personal email ID.
- OTP: Enter the 6-digit OTP received in your email ID.
- First Name: Enter your First Name.
- Last Name: Enter your Last Name.
- Country: Enter country name.
- State: Entering the country enables the State field. If the country is The United States, a dropdown list of states is shown. If it is other than The Unites States, then enter the state manually.
- Password: Enter your password.
- Confirm Password: Re-Enter your password to verify.
- Click on the Register link at the bottom of the Sign In Page if not yet registered.
- You will be redirected to another screen with 2 options: Student Connect and Parent Connect.
- select the Student Connect option and you will again be redirected to another screen with 2 Options: With Student ID and Without Student ID.
- Select the Without Student ID option.
- You will be redirected to another screen with Email ID as input Field.
- Enter Your email ID and click on Continue. You will be redirected to another screen.
- You will receive an OTP in the Personal Email ID you entered.
- Enter the OTP received and click on Verify. Click Resend OTP if required.
- After verification, you will be redirected to a new screen with various input fields.
- After filling the required details, click Register.
- A pop-up message: "Success! your account has been created" is displayed. Click on "OK".
- You will be redirected to the Sign In Page. Enter Your credentials and Sign In.
- Make sure to fill all the details correctly.
- Your password must be at least 8 characters long and can include a combination of letters (both uppercase and lowercase), numbers, and special characters (such as !, @, #, $, etc.).
- In the Country field, if your country is United States, then a dropdown list of States will open. If the country is Other than The United States, then you need to manually enter the state.
- You can go back to the user inquiry page at any time by clicking the “Cancel” button or “<” icon.
- To Register with Your Google email ID:
Screen 2.2.2.1: Click on the Continue with Google
- Continue with Google: Click and select your Google Email ID.
- Click on the Register link at the bottom of the Sign In Page if not yet registered.
- You will be redirected to another screen with 2 options: Student Connect and Parent Connect.
- select the Student Connect option and you will again be redirected to another screen with 2 Options: With Student ID and Without Student ID.
- Select the Without Student ID option.
- You will be redirected to another screen with Email ID as input Field and a Continue with Google button below the Email field.
- Click on the Continue With Google button.
- A list of Google emails ID's on your device will show up.
- Select the required email ID.
- You will directly be Registered and Signed In with google ID and will be redirected to the dashboard.
- Make sure to fill all the details correctly.
- Make sure your password comprises of atleast 8 AlphaNumeric Characters.
- In the Country field, if your country is United States, then a dropdown list of states will open. If the country is Other than The United States, then you need to manually enter the state.
- You can go back to the user inquiry page at any time by clicking the “Cancel” button or “<” icon.
Back To Student Registration
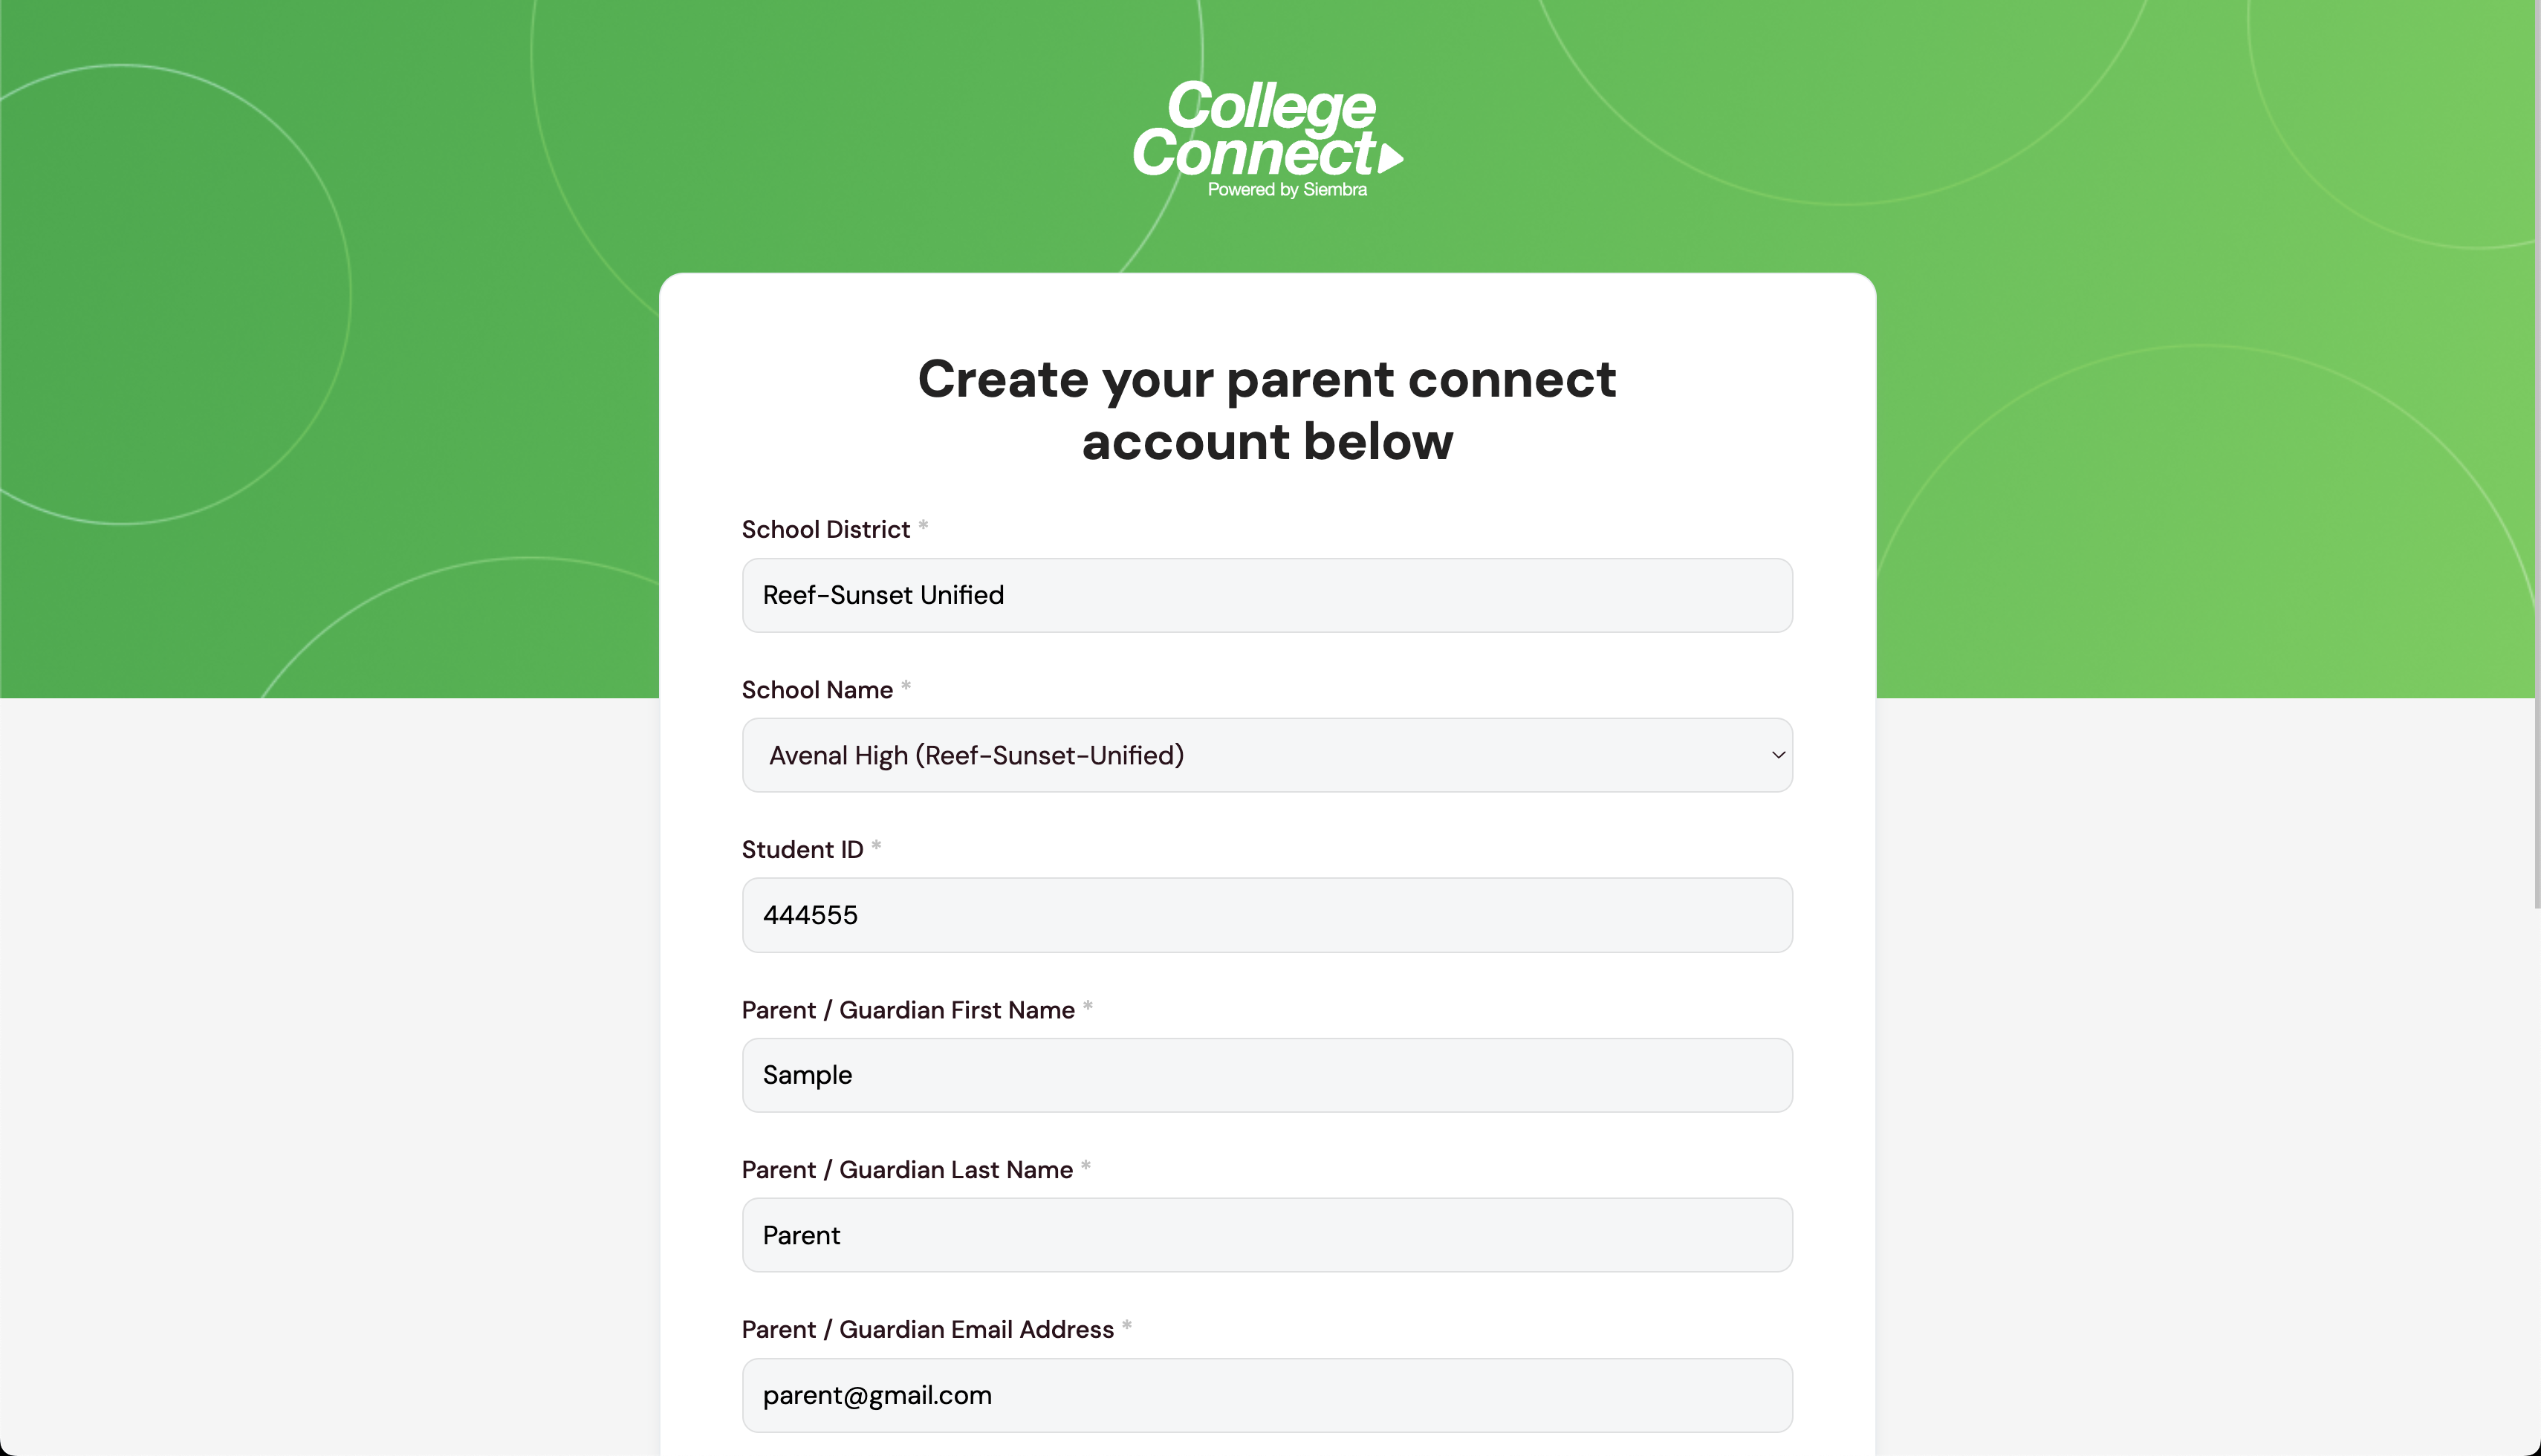
3. Parent Registration
- To register as a Student, click on Register on the Login page and click on Parent Connect.
Screen 3.0.1: On the login page click on Register to start registration process.
Screen 3.0.2: On the Registration Screen click on Parent Connect to register as a parent.
Screen 3.0.3: Fill the required details.
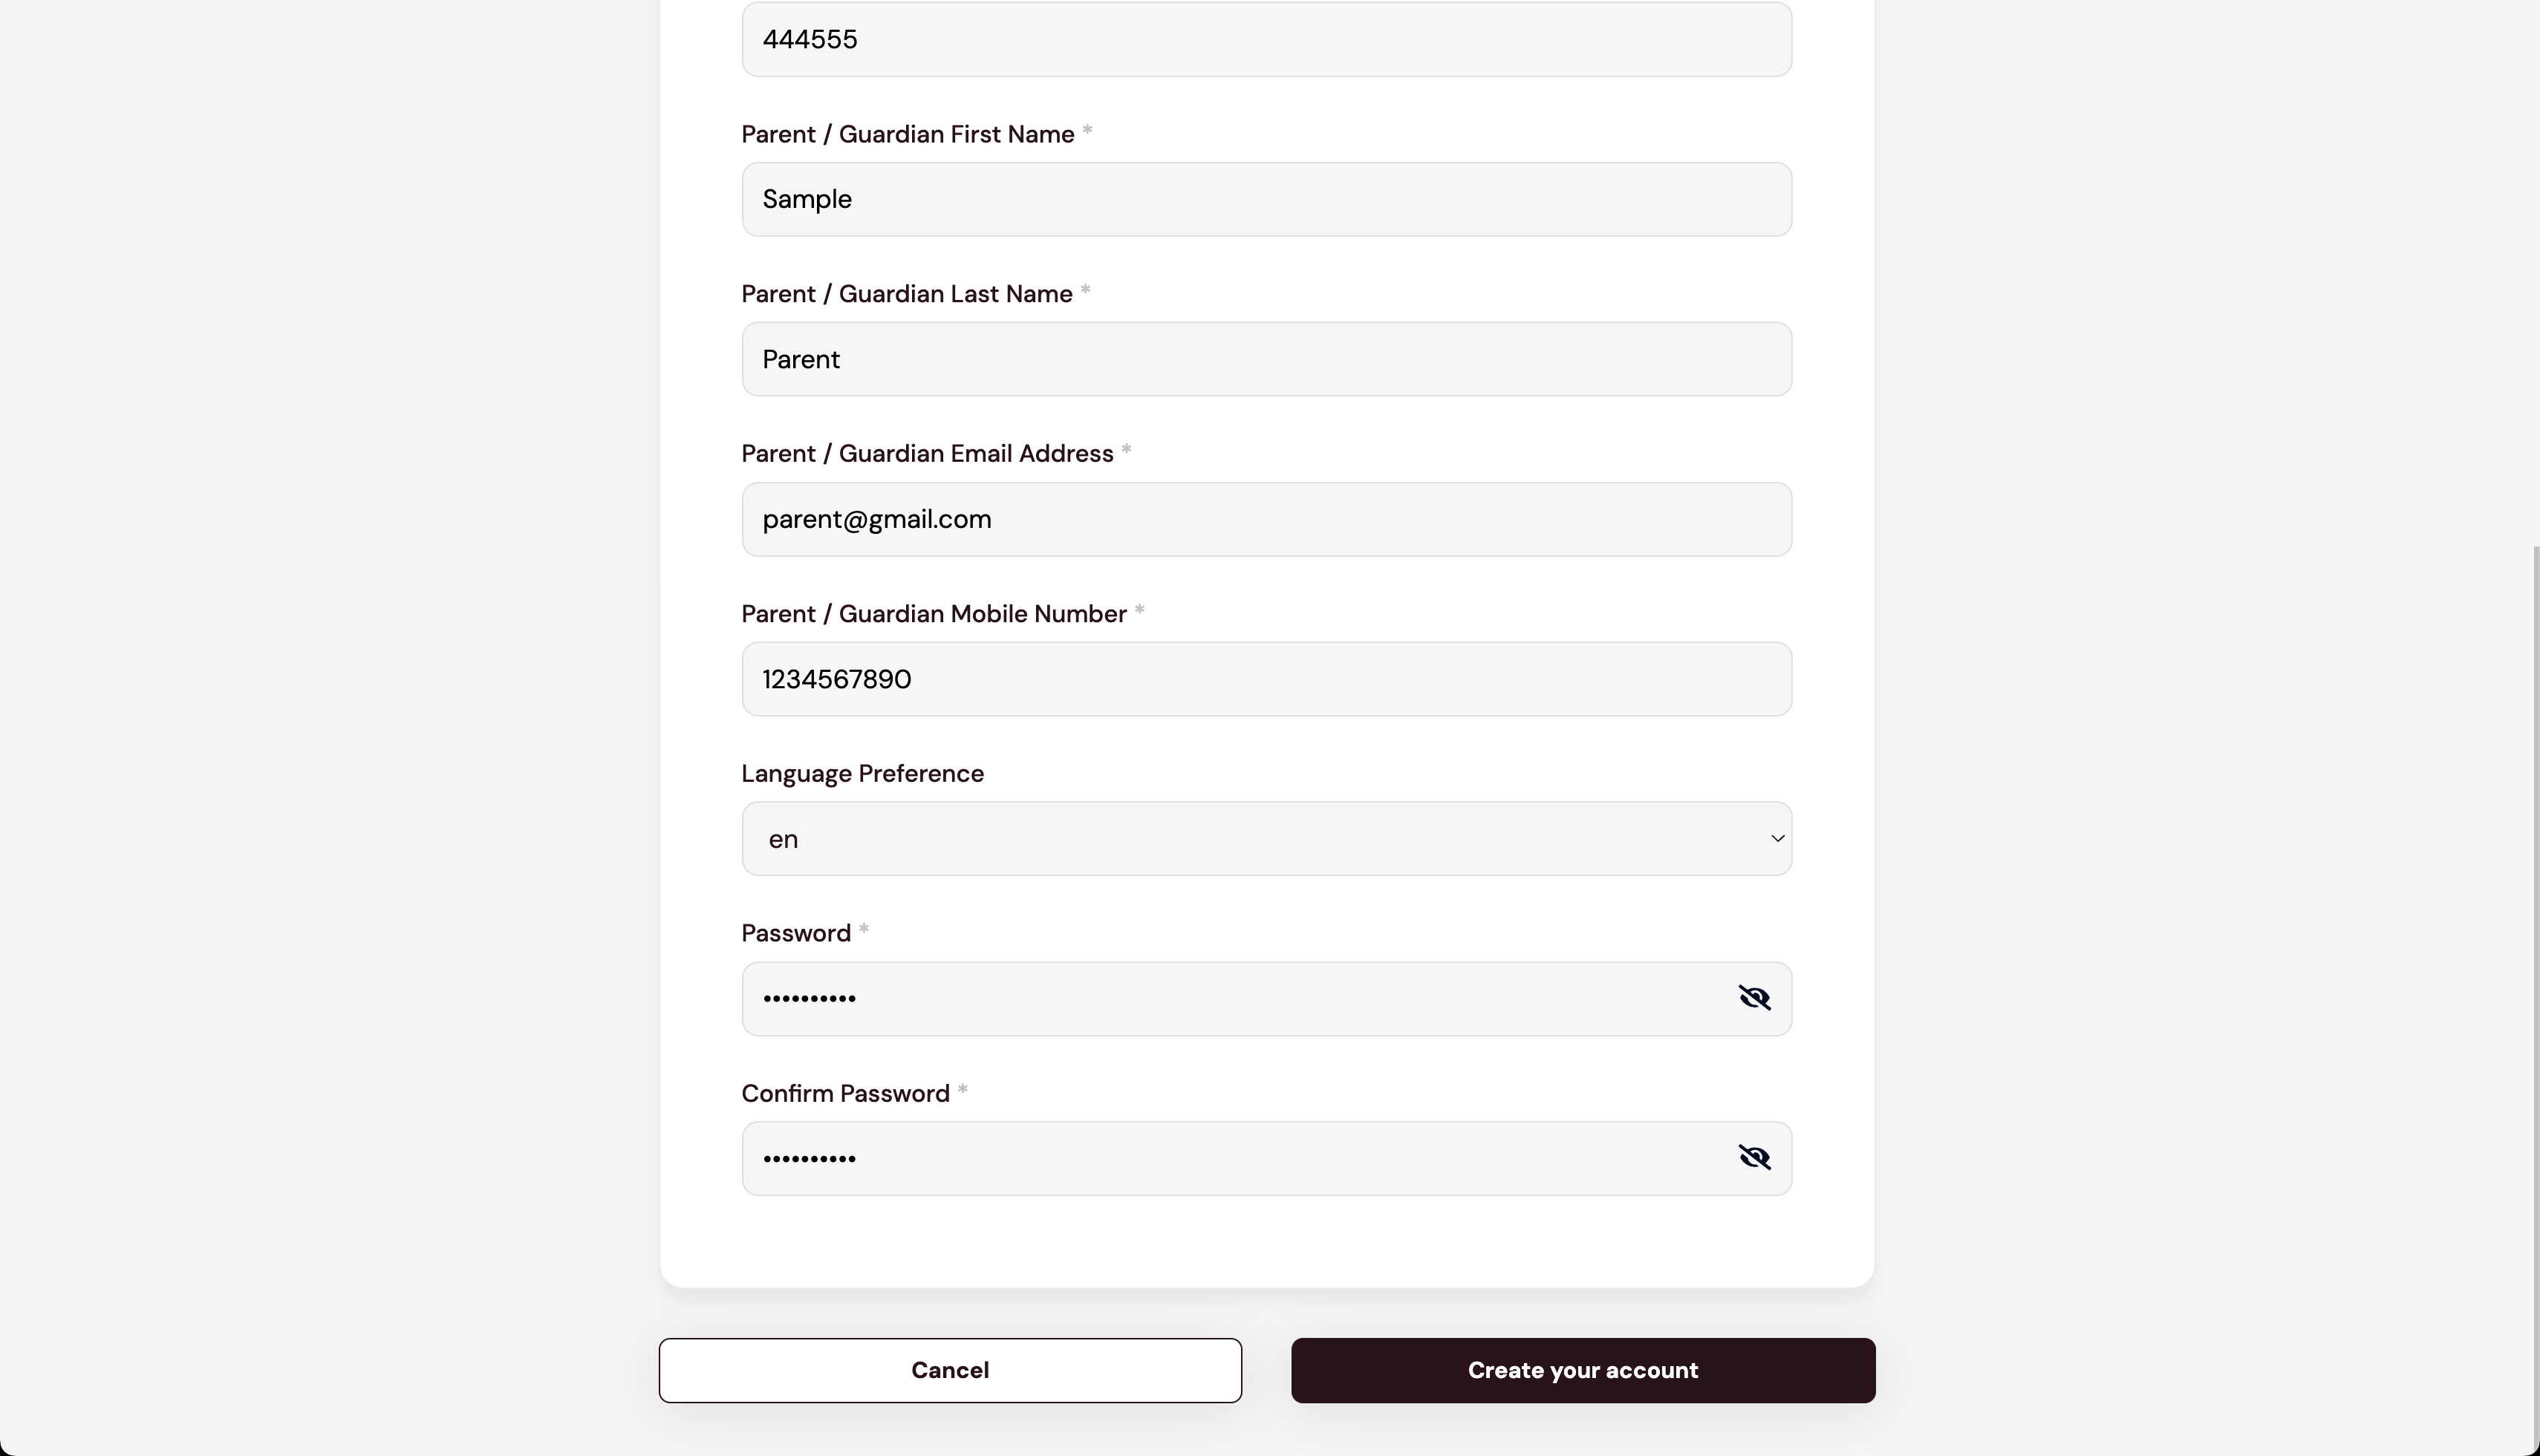
Screen 3.0.4: Fill the required details and click on Save Profile.
- Fields:
- School District: Enter your child's school district.
- School Name: Enter your child's school name.
- Student ID: Enter your child's student ID.
- Parent/Gaurdian First Name: Enter your first name.
- Parent/Gaurdian Last Name: Enter your last name.
- Parent/Gaurdian Email Address: Enter your email address.
- Parent/Gaurdian Mobile Number: Enter your mobile number.
- Language Preference: Select your preferred language [EN/ES].
- Password: Enter your desired password.
- Confirm Password: Re-enter your password.
- Procedure:
- Click on the Register link on the Sign In Page. You will be redirected to the register page.
- Fill all the required details.
- Click on Save Profile. You will be redirected to the Sign In page.
- Enter your credentials to Sign In.
- Notes:
- Make sure you fill all the fields correctly.
- You can go back to the user inquiry page at any time by clicking the “Cancel” button or “<” icon.
Back To Parent Registration
4. Forgot Password
- If you have forgotten your password, you may reset it by clicking "Forgot password" below the input fields in Sign In page.
- Fields:
- Email: Registered account E-mail, which should be the same as the E-mail of your login account,should be entered in the Reset Password Page.
- Password: Enter your new password.
- Verify Password: Retype new password, which should be the same as above.
- Procedure:
- Access the Forgot Password page by clicking “Forgot my password”.
- Enter a valid E-mail address in the E-mail field and click “Reset Password” to proceed to reset your password. An E-mail notification will be sent to you.
- Check your registered E-mail and confirm your password reset action by clicking on reset password “link”. It will direct you to the new password page.
- Enter your desirable new password in Password field and the same password in the Verify Password field, and then click “Reset Password” to continue.
- Upon completion, a successful password reset confirmation will be displayed.
- Notes
- After the system has accepted your request, you will receive an email to proceed with your password reset. You must log in to your email system and change the password immediately.
- You will be prompted with error when:
- The email address field is blank.
- The entered email address is not the valid registered email address for your account.
- Your user account has been locked or deactivated. In such case, you must contact PCCW Global administrator or Customer administrator to unlock or re-activate your account.
- The Confirm Password field does not match the New Password entered.
- The new password matches the old password.
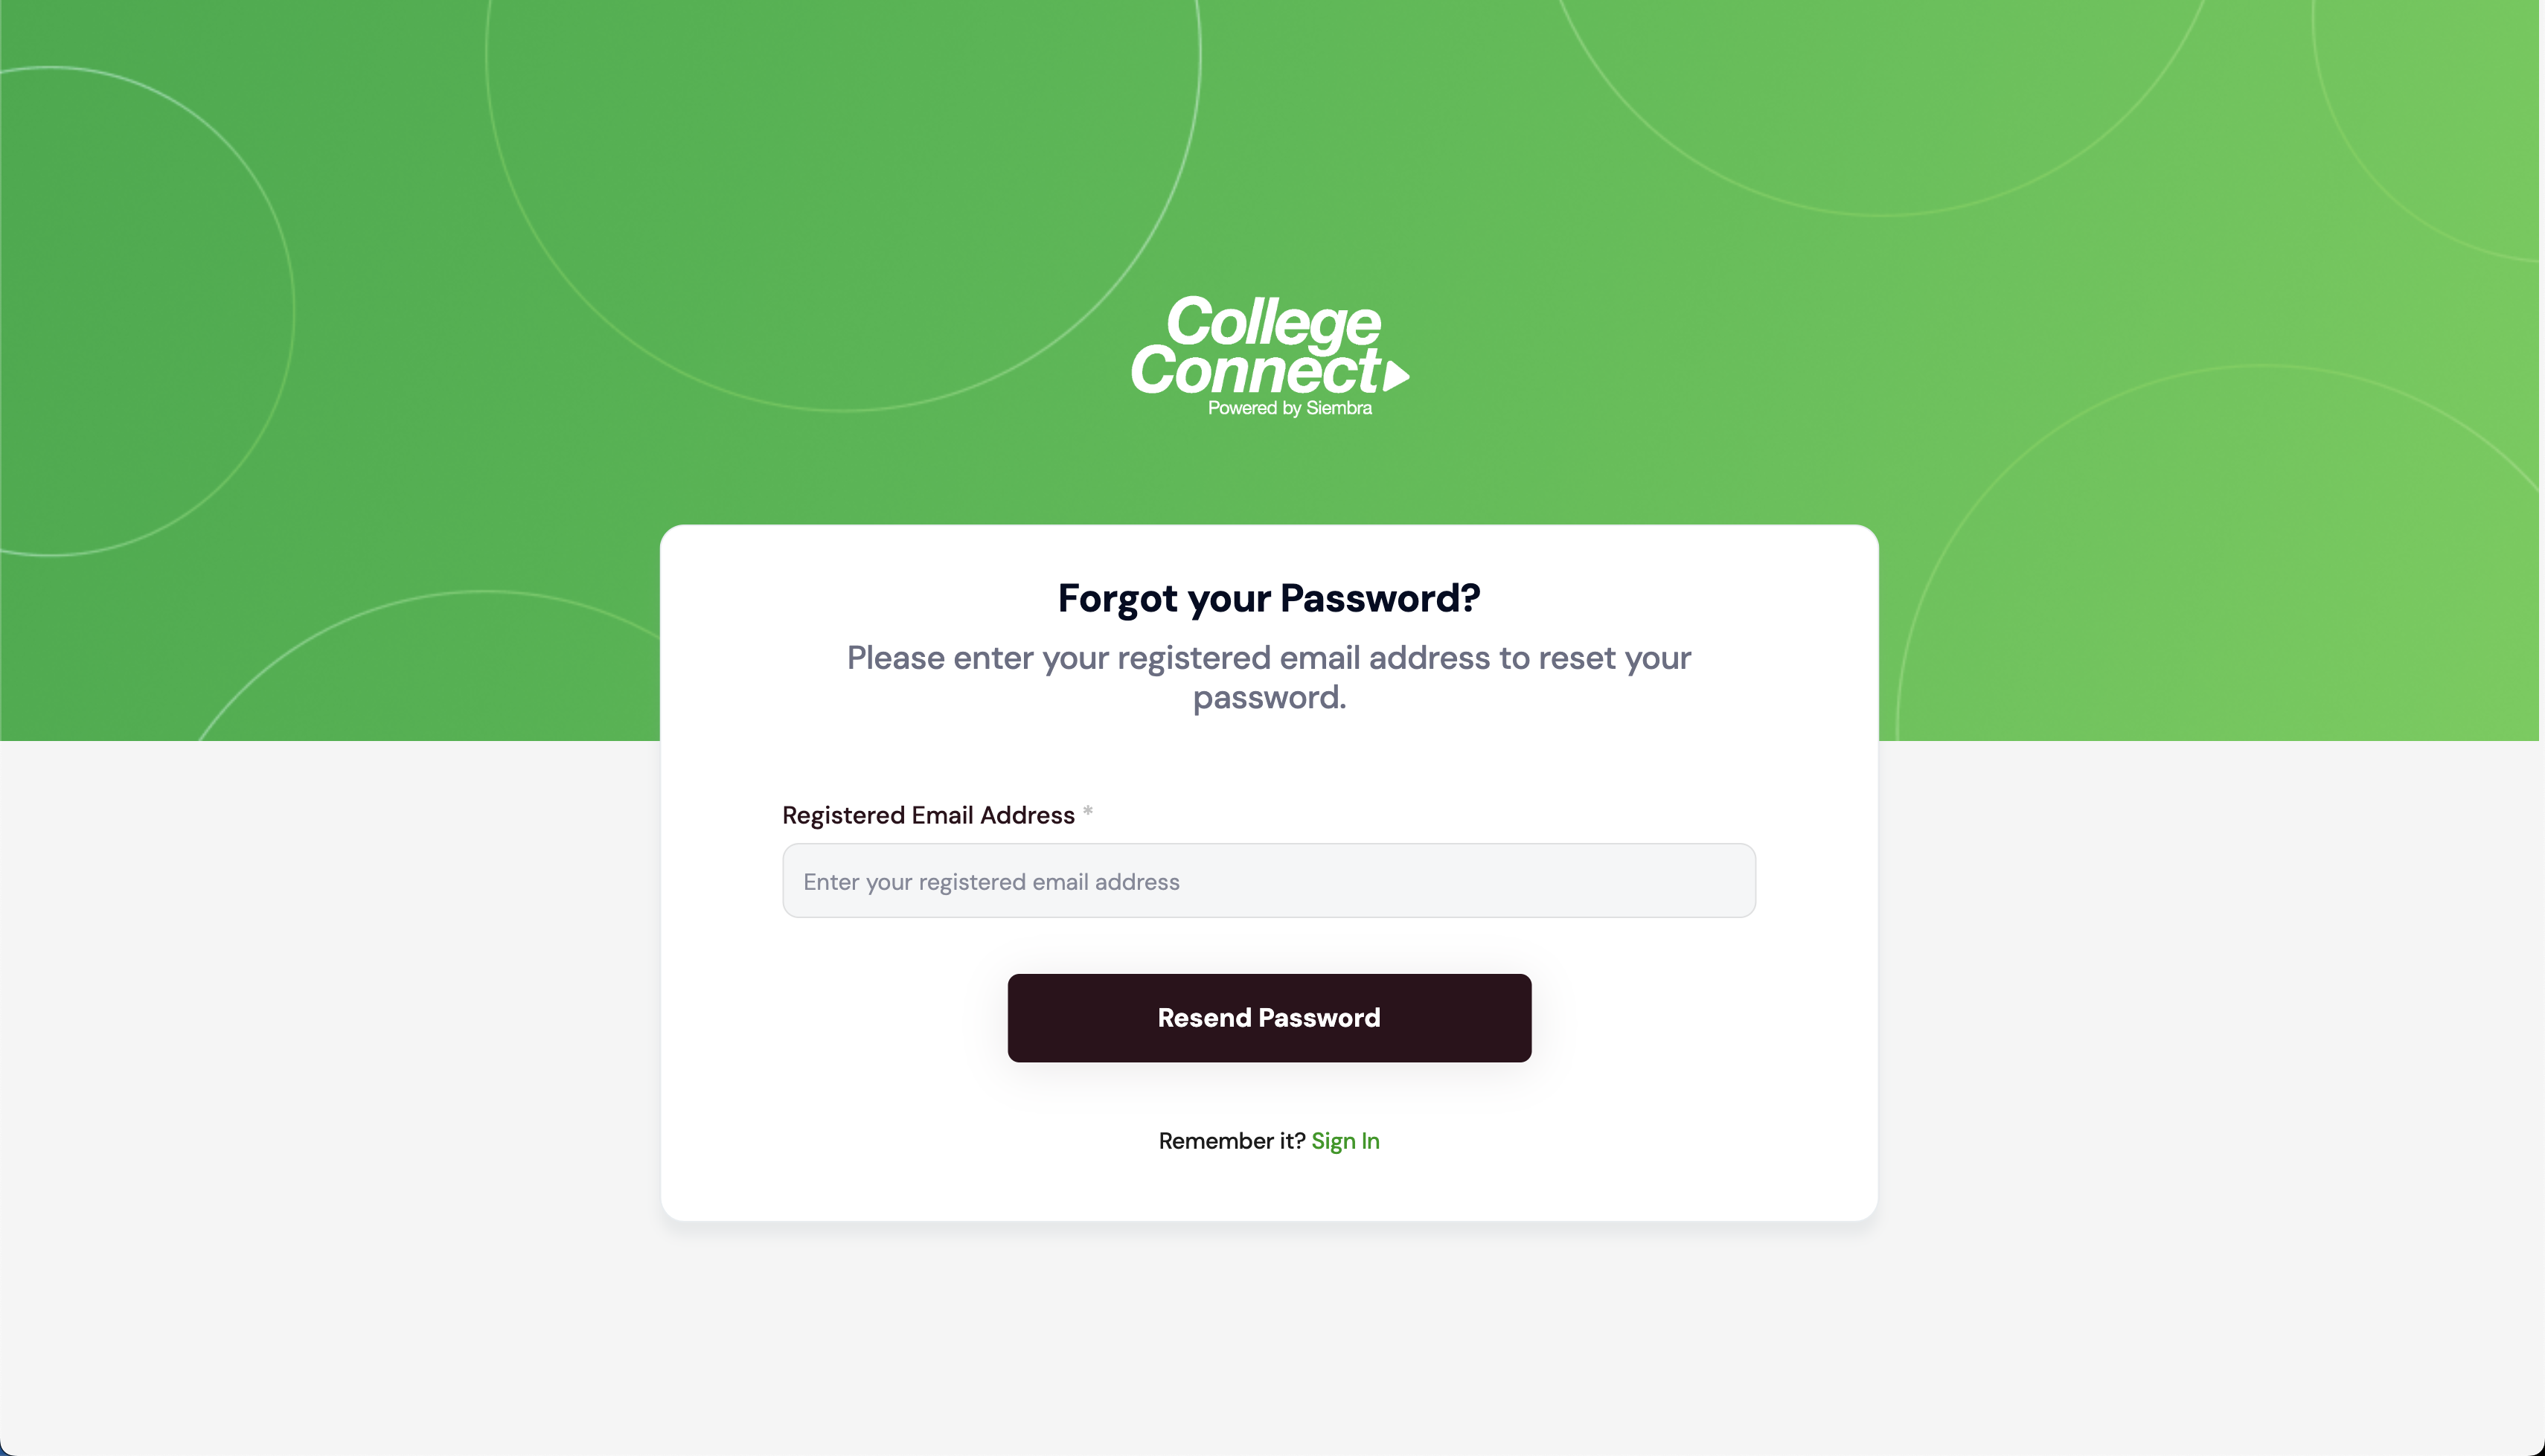
Screen 4.0.1: Forgot Password Screen.
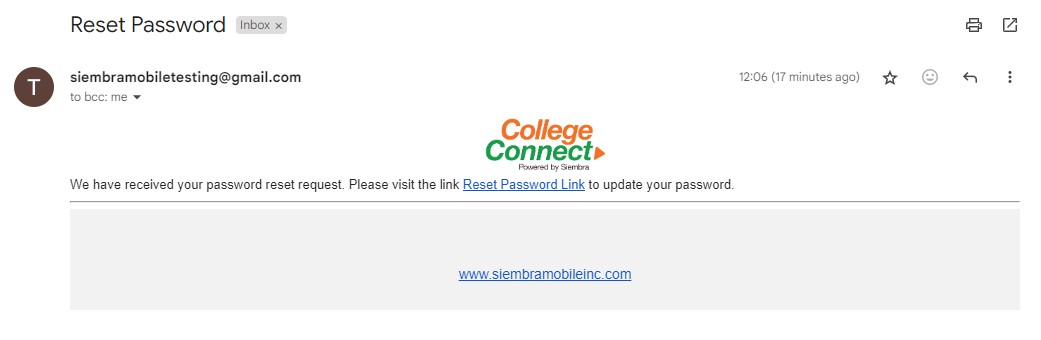
Screen 4.0.2: Password Reset Link shared in E-mail.
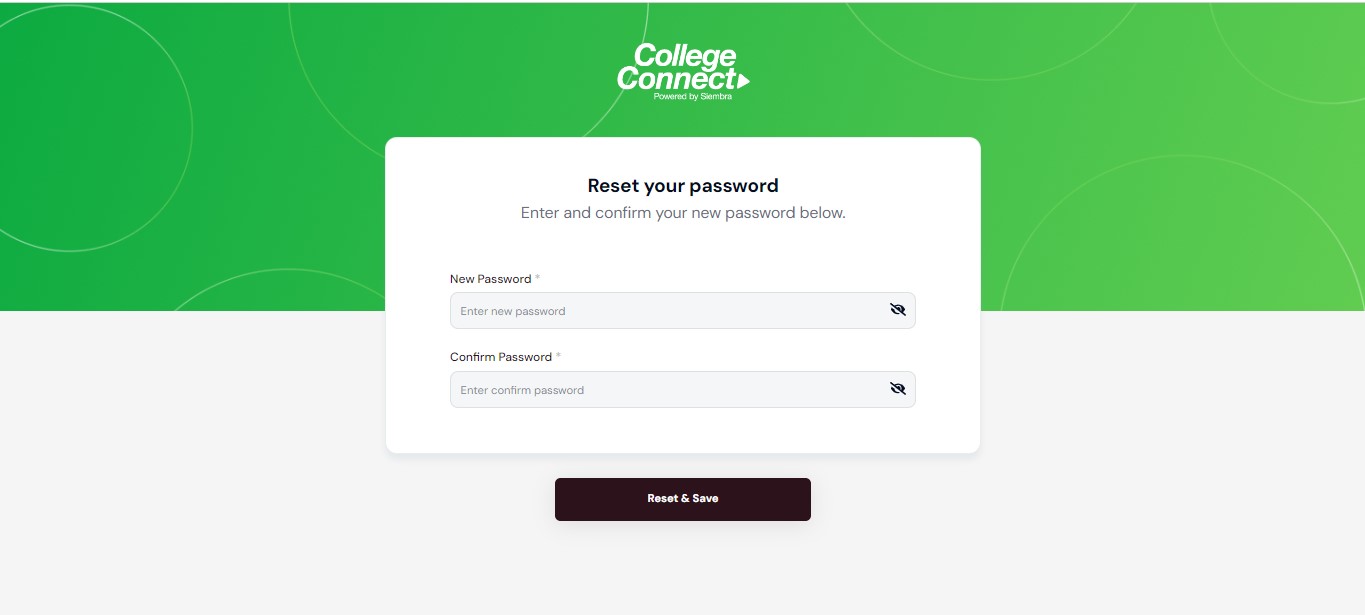
Screen 4.0.3: Password update Link. Fill in the required details
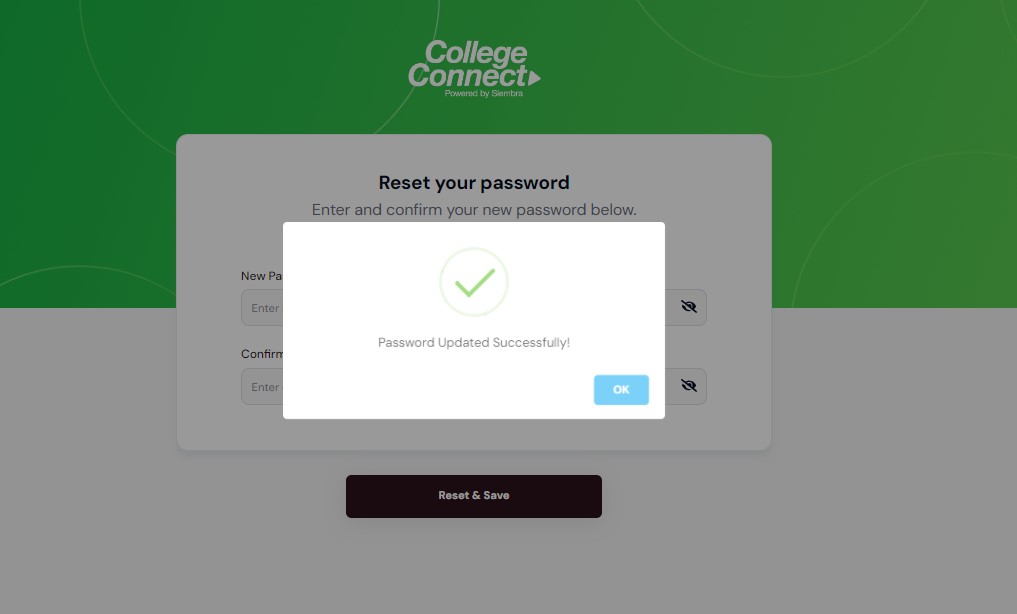
Screen 4.0.4: Successful Password update
Back To Forgot Password